What is it about the Disney villains that we love so much? They're the bad guys, but sometimes we feel sympathetic toward them—even going so far as to root for them! You'd be mad if you were conveniently not invited to a baby shower, right? It would sting if your mirror told you what it really thought of you too. Sure, Maleficent and the Evil Queen may have overreacted a little, but who doesn't at some point? We have a trio of Disney villain makeup tutorials for you, so get ready for some Evil Queen, Maleficent, and Ursula makeup tutorials! You don't want to be one of the poor, unfortunate souls who don't use makeup to your advantage with these Disney villain costumes.
Ursula Makeup Tutorial
The boss is on a roll!
Ursula Makeup Tutorial Transcript
Today we are going to show you how to do a Ursula makeup look. To match Ursula's skin tone, start with a lavender body paint. Off-camera, we did glue the model's brows down. Here you can use a glue stick or a brow gluing gel. With a synthetic foundation brush, buff all across the face, and as close to the eye as possible. Be careful not to get into the eye, as body paint will sting. With a non-water-based body paint, keep in mind products you place on top will shift and move. Set with a translucent powder to help minimize this.
Since Ursula's eyes are larger, we will be making a new eye shape. Starting at the eyebrow's tail, follow the outer eye's contour with a gray eyeshadow. Diffuse that eyeshadow a little bit outwards to soften the edges. Using a dense eyeshadow brush, pack a blue eyeshadow onto the eyelid. Make sure to sweep that blue eyeshadow upwards to meet the gray eyeshadow you placed down before. Lining the new eye shape with a black eyeshadow, start at the bottom of the brow and sweep across. Don't worry about it being perfect; you will blend it out to meet the gray eyeshadow. Apply a light pink shimmer shade to the apples of the cheeks.
Now, take a black eyeliner and line the top of the eyelid. Wing the eyeliner outward towards the tip of the eyebrow. Starting at the top of the natural eyebrow, use an angled brush with a black eyeshadow to start Ursula's eyebrow shape. Make sure to keep the line really thin to give it that Ursula look. Angle that brow line towards the top of the ear. To give it that cartoon flair, start on the inner corner of the brow and flick the brush upwards. Now, add mascara and lashes for that dramatic effect. Take the same eyeliner and draw across the lower lash line. Add extra wings to give Ursula's accentuated bottom lashes at the edge of the bottom lash line.
Next, take a darker purple eyeshadow and place in the hollow of the cheekbones. To get Ursula's dramatic cheekbones, blend downwards and towards the nose. Take the same dark purple eyeshadow and sweep across the hairline. To deepen the jawline, add that same dark purple eyeshadow.
Taking a red lip color, start in the center of the lips and blend outwards. It doesn't have to be perfect, as we will go in with a liner to sharpen the edges. To give it that Ursula pout, draw outside the natural line of the lips. Take the lip liner and add it to the outer corners of the mouth to deepen the edges. Place a shimmer gloss in the center of the lips. And don't forget Ursula's signature beauty mark. Use a black eyeliner to dot just below the mouth.
Ursula Costumes
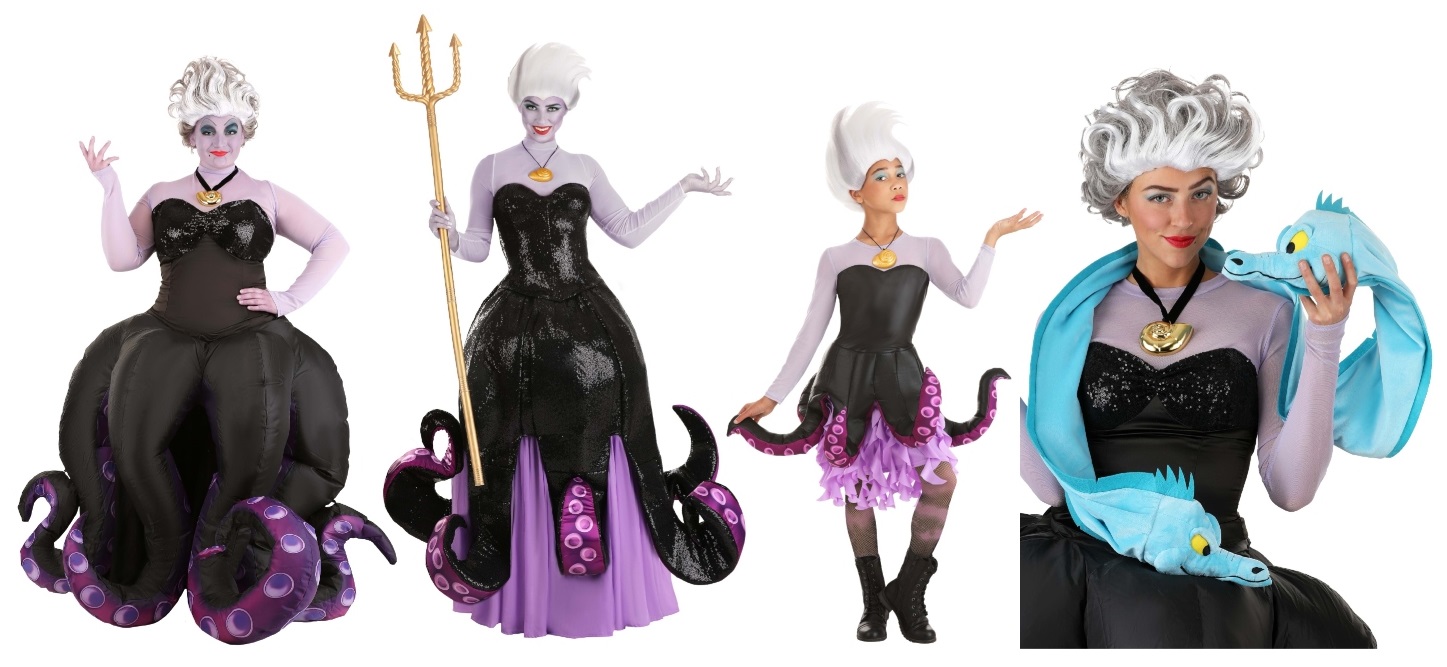
| Plus Size Inflatable Ursula | Adult Ursula Costume | Tween Ursula | Flotsam and Jetsam Scarf |
Now you know how to plan your Ursula makeup, but you still need a costume to go with it! Why not check out one of our fabulous Ursula costumes? We have an array of Ursula costumes in adult plus and regular sizes, as well as tweens and kids. And don't forget the accessories! Flotsam and Jetsam rarely leave her side, and a wig will have you rocking her signature hairstyle in no time. Get ready to rock your next costumed event as the maliciously manipulative Ursula!
Evil Queen Makeup Tutorial
Magic mirror on the wall, who is the fairest one of all?
Evil Queen Makeup Tutorial Transcript
Today we will be showing you how to do a basic makeup tutorial for the Evil Queen. We started with the foundation using a medium to full coverage as a nice base to give that Disney porcelain skin, using it under her eyes as well. Using a fluffy brush, you want to buff the foundation into the skin to make sure that it gives it that airbrushed look. Use a translucent powder to set the foundation, and to further matte-ify the skin for that porcelain look.
Using a taupe color, lightly brush a sculpting powder in the hollow of the cheek and across the forehead to even out the color and accentuate the cheekbones. Brush a little across the jawline to bring out that villainous shape. Using the same angled brush and a soft pink blush, dust the blush across the apple of the cheeks, and using whatever is left on the brush, dust across the center of the face to accentuate that flush.
Make sure to eye an eyeshadow primer, which helps with pigment intensity, and ensures the makeup will last throughout the night. Using a cool-tone brown to fill in the brows, you can start at the base of your eyebrow and fluff the product upwards. Here I used a brown for the model, but you can use whatever brow products you typically use.
Starting with a mid-tone brown eyeshadow, place at the outer edge of the eye and sweep through the crease. This transition shade is great for a smoky eye. You want to gradually build the color. Remember where you place the brush first, where the most color will deposit. so, make sure to keep the intensity at the outer corner of the eye. Now, going in with a darker color, place just at the edge of the eyelid in the outer corner. Use a small amount and build color to desired intensity. Sweep a light color across the brow bone to highlight. Using a light shimmer shade, dust across eyelids to add sparkle.
For that extra smoky definition, use an angled brush and use the dark color from the top of the eye, and press into the bottom lash line. Line upper lash line with black gel line or black liquid, and wing out a bit. Add some mascara and pop on some lashes for that extra dramatic effect.
Fill in the lips with a red lipstick color. It doesn't have to be perfect here, as we will line afterwards and sharpen the shape. Now, use red lip liner to line the lips.
Evil Queen Costumes
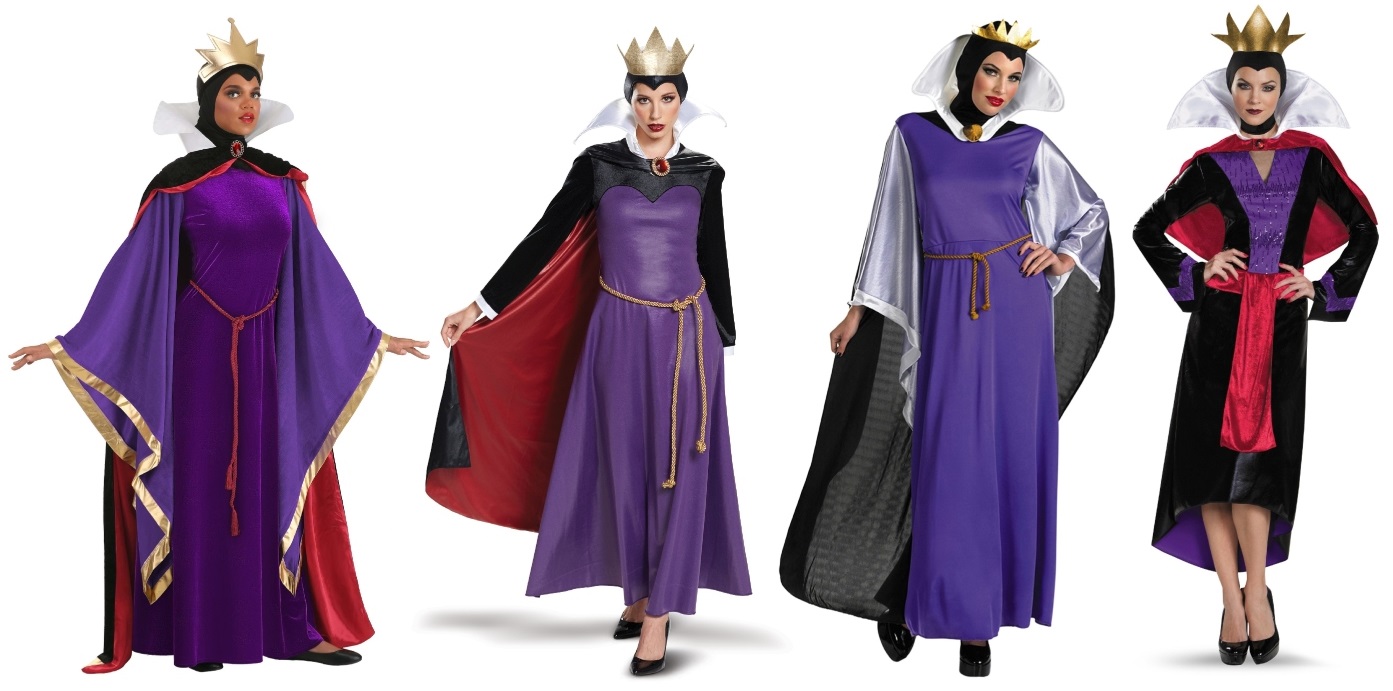
| Snow White Evil Queen | Adult Evil Queen Costume | Wicked Queen Costume | Women's Evil Queen |
Get ready to be the fairest one at the Halloween party with these Evil Queen costumes! Disney's first-ever villain is utterly iconic with her flared collar and a crown atop a cowl. (You'll make that magic mirror think twice!) These long purple robes are also quite comfortable, avoiding stiff boning or tightly-fitted clothes. Not only will you look exquisite, but you'll feel effortless while doing so!
Maleficent Makeup Tutorial
Well, well. What a glittering assemblage.
Maleficent Makeup Tutorial Transcript
Today we will be showing you how to do a Maleficent makeup look. The model is starting with applied Evil Queen makeup look, which you can see on the Evil Queen makeup tutorial video. To bring out that Maleficent porcelain finish, go in with a lighter foundation shade and buff powder into the foundation already applied. next, go in with just a slightly darker, cool-toned color, and place in just the hollow of the cheekbone. Blend that forward and down to soften edges.
To carve out those cheekbones, lightly add the color and build. Take the first cool tone sculpting color, and sweep it down the contour of the nose, a bit at the tip, and work it to the brow. To bring out that cheekbone even more, add a light highlighting powder to the tops of the cheekbones. To get those Maleficent facial features, we are going to sweep a mid-tone brown back into the crease, and deepen it a little bit more.
Dust a gold eyeshadow into brow bone, and over the lid to add a pop of color and to give her that ethereal glow. Fill in brows a bit more with preferred brow color and product, and make sure to use an angled brush on the tail to wing it out just a bit.
Fill in lips with a red lipstick, starting in the center and blending out. Use a lip liner in matching color to sharpen the edge of the lips. You can slightly draw outside of the natural lip line shape to give them a more pouty look. To add more depth, use a little of the liner in the corners of the mouth. To add extra pout, pop a little bit of a shimmer gloss in the middle of the lips.
Maleficent Costumes
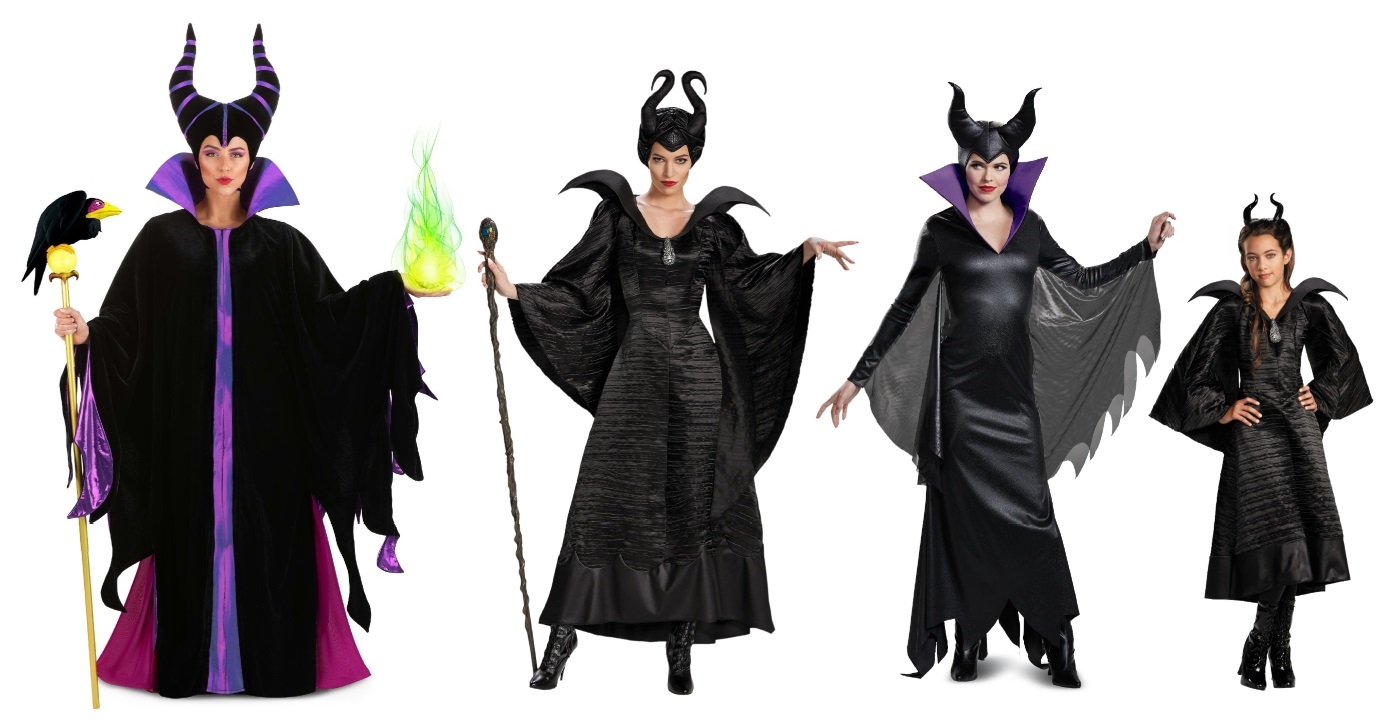
| Adult Classic Maleficent | Live-Action Maleficent | Women's Maleficent | Child Maleficent |
Like several of her fellow villainesses, Maleficent has a few different outfits depending on which movie version you're hoping to recreate. (And she's so fashionable! Why do Disney villains have such great taste?) Our makeup tutorial is based on the live-action Maleficent movie with Angelina Jolie, but that's not to say that you can't be more fond of her classic outfit. Should you happen to be a mom, you may be familiar with the Descendants version of Maleficent. No matter which Maleficent costume you choose, just remember one thing when doing your makeup—CHEEKBONES! #CheekbonesForDays
Hades Makeup Tutorial
Well, well. It's a small underworld after all!
Hades Makeup Tutorial Transcript
Welcome to HalloweenCostumes.com! Today on this makeup tutorial, I am going to help you become Hades from Disney's Hercules. With a white eyeliner pencil, draw on an outline to guide the face. Start filling with a light blue-gray face paint.
Shape brows with black face paint. Draw in the brow expression lines with a dark blue-gray eyeshadow. Fill in the eye area with a dark blue-gray face paint. Use a matching eyeshadow color to create depth and to also help paint from creasing around the eye area.
Fill in the sides of the face with a dark blue-gray face paint, blurring downward to create an ombre effect. Add a little white face paint to the dark blue-gray to help with this transition. Clean up any lines and edges. Use a medium-blue eyeshadow to sculpt out the cheeks. Highlight the chin, cheekbones, and bridge of the nose with white face paint. Use a medium blue-gray eyeshadow to contour the nose.
Give Hades his signature pout by using two different blue face paints. Use a dark blue-gray on the top lip, and a medium blue on the bottom. Add extra depth to the lips with matching eyeshadow colors. This also helps the paint stay put.
Accentuate the nostrils with dar blue-gray face paint. Chisel out the cheekbones a little bit more using a dark blue-gray eyeshadow. Draw on smile lines with a dark gray paint, and set with a matching eyeshadow color. Blend the light blue-gray paint down the neck. Put your hades wig on to pull the whole thing together. Don't forget those earlobes! Clean up baby edges, and add any finishing touches, and you're ready for the party!
Hades Costume
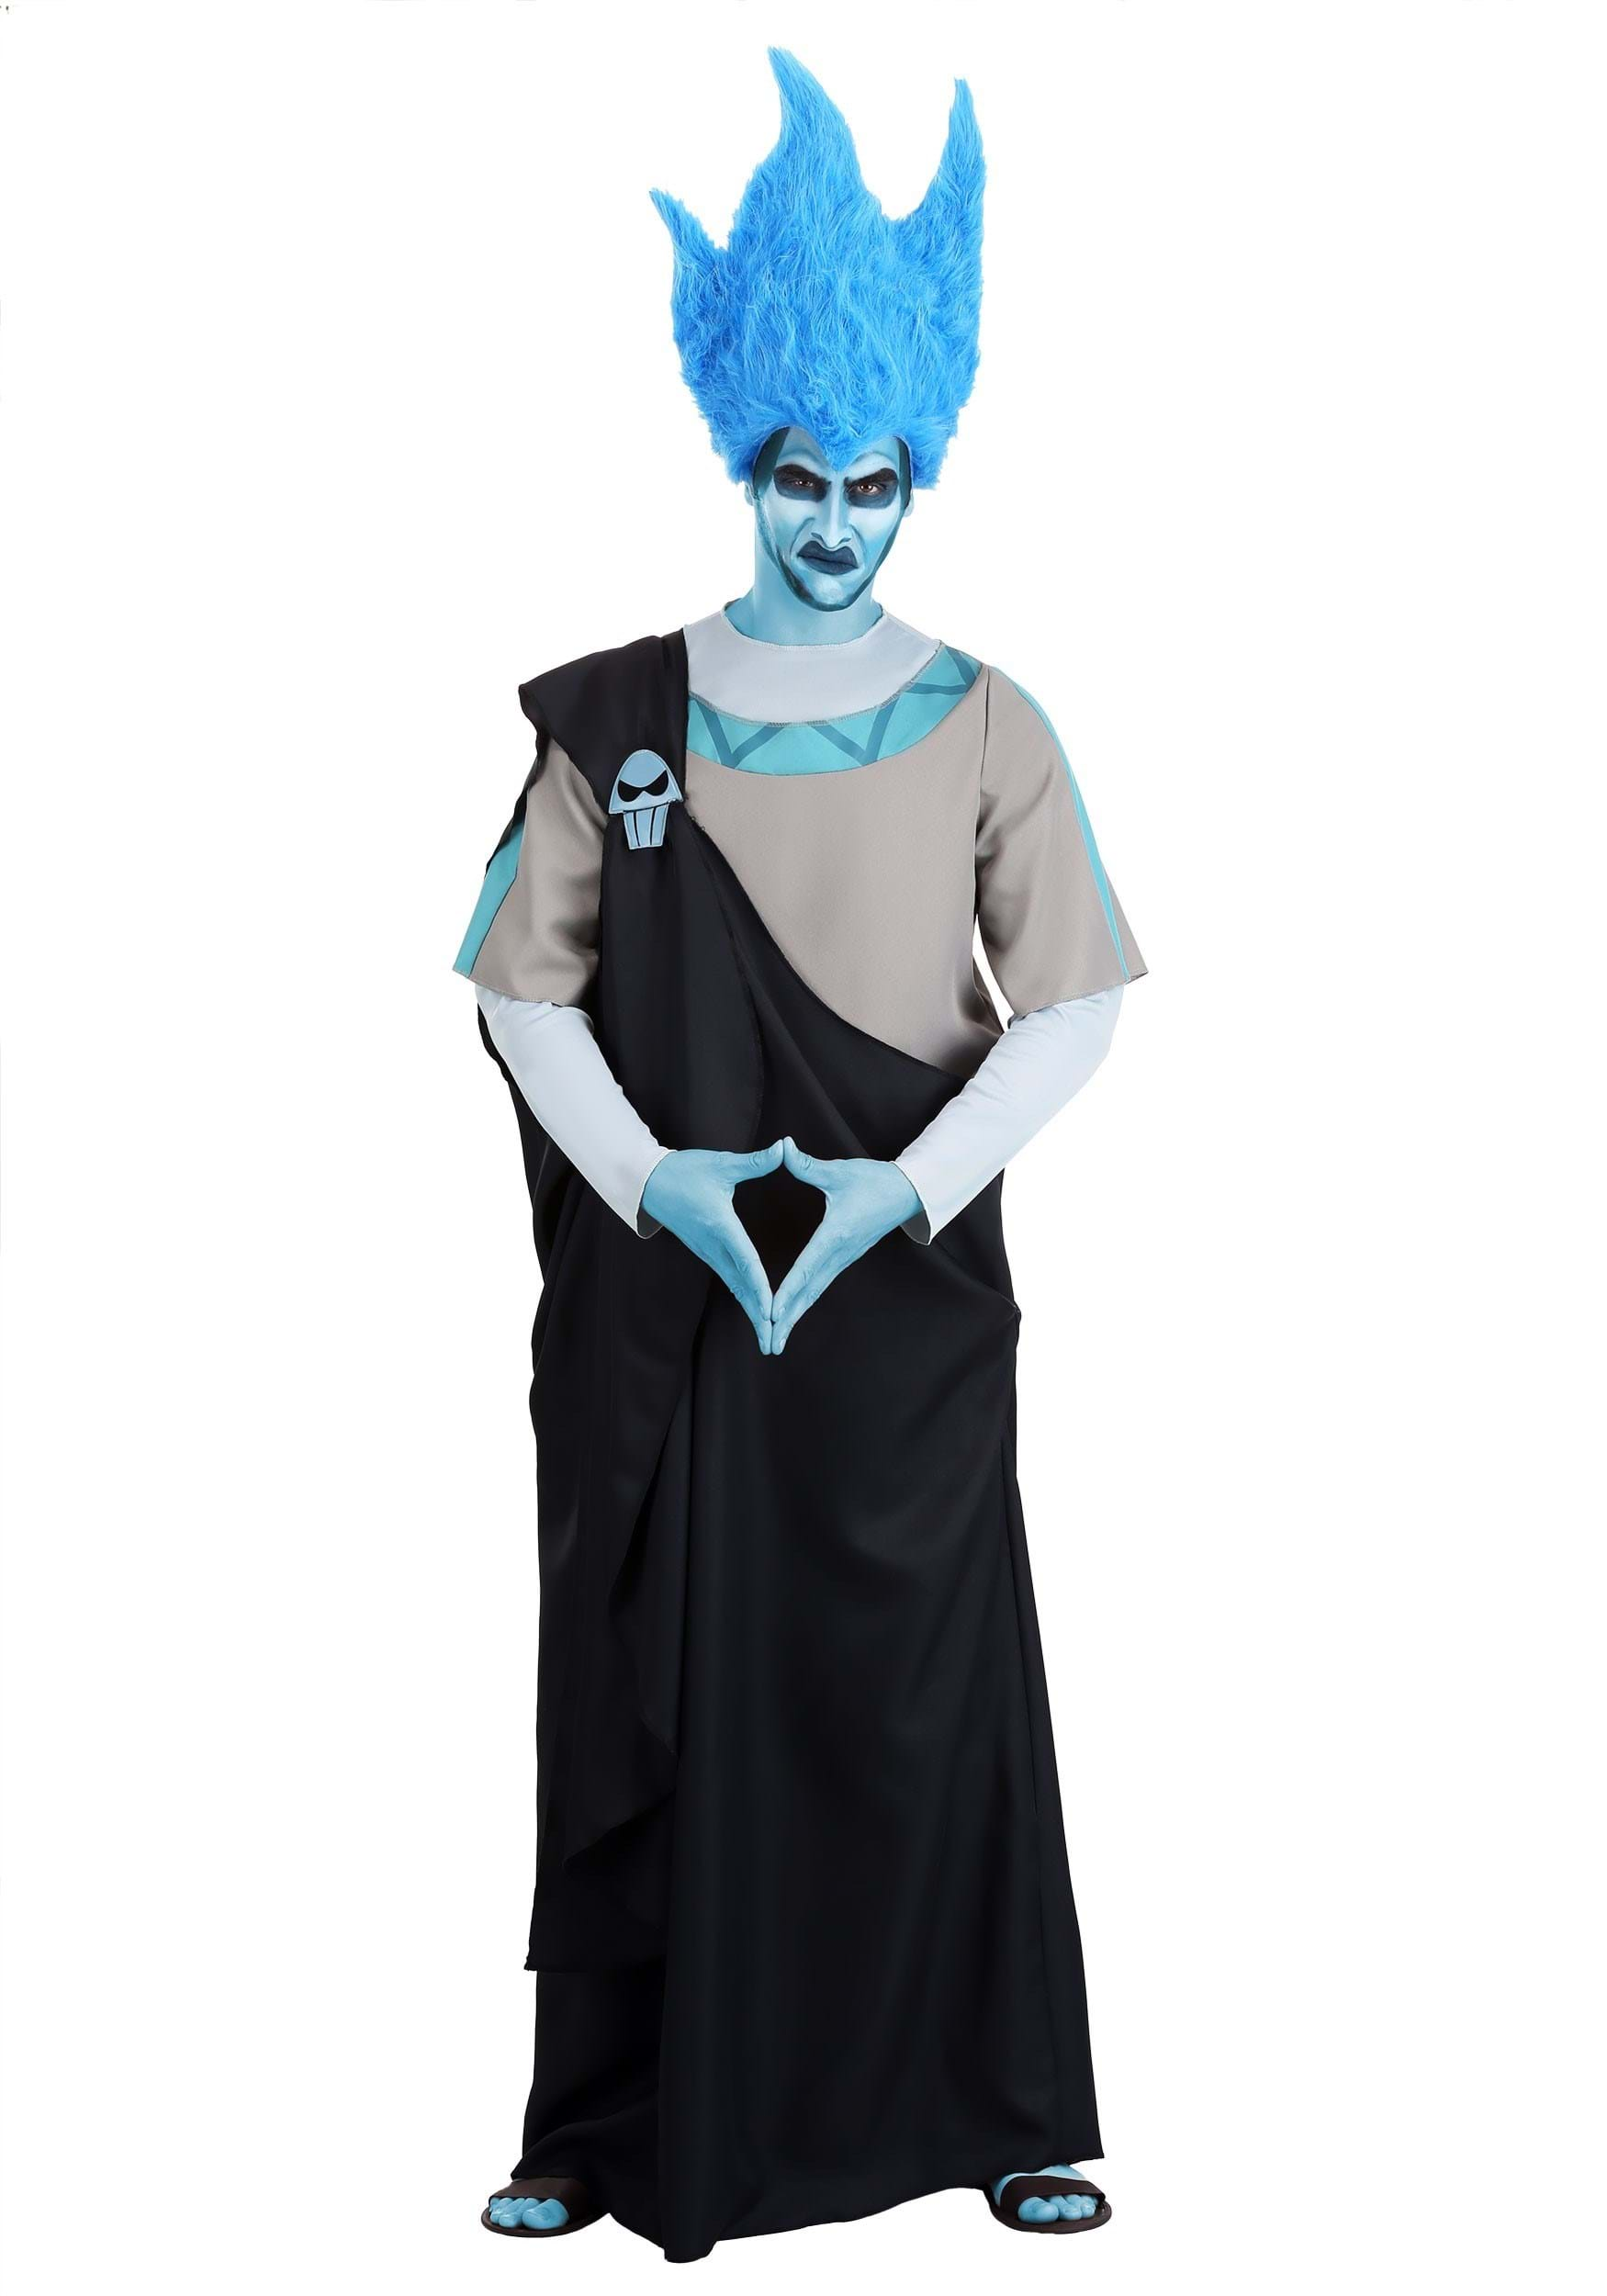
Get ready to transform into the snarkiest Disney villain with a Hades costume! This costume set comes with the robe and the wig, and once you have your makeup in order, you'll be ready to go. Find a pair of comfy sandals, and you'll be ready to rock with your fellow Halloween partygoers. Keep some of Hades' best lines in your back pocket, and you'll be a hit!
We hope you feel delightfully devious in your new Disney villain makeup! Are you an Ursula fan, or is Maleficent more your speed? What other makeup tutorials would you like to see us do next? We'd love to hear back from you!

