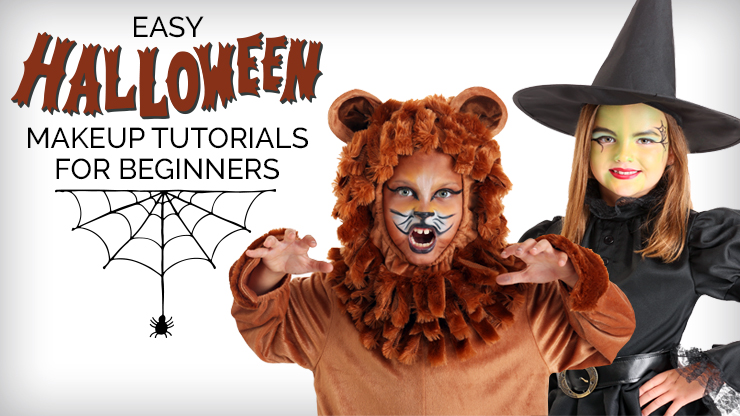
So you want to do some Halloween makeup but aren’t exactly sure how to do it? Well, don’t worry, Halloween experts to the rescue! We absolutely love dressing up for Halloween and finding Halloween makeup ideas to match. We’ve put together a few easy makeup tutorials for kids to help the everyday mom get the professional look. Along with the videos, we’ve put together some helpful tips and tricks to make this as smooth as possible for you.
What’s an easy way to do makeup on kids?
First get yourself prepared. Have all your supplies ready before you sit the kids down. We found it was easy to use a cake pan with a towel on it to hold all our supplies. This ensured that none of the supplies would roll off the table, and provided one small area to keep them all in. Get yourself and your kids comfortable. It might be best to sit down on a couch and have a show on the TV so they are occupied and will sit longer. If they get fidgety try having them lay down either on you or on the armrest of the couch. Less is sometimes more so be mindful of their attention span and their ability to sit still.
What are some easy makeup tips?
Tie all their hair out for their face before starting, whether that is with a hair tie for long hair or using bobby pins and clips for shorter hair. Make sure you give yourself enough time, even try practicing a few days before Halloween so you know what to expect the day of. Use a dry brush to blend and fade out to a more translucent color. To get an opaque color use a sponge, which will give you a full coverage but more transparent. You can test the colors by applying to your hand before their face. If it’s not the color you would like, dip in water and brush on towel to change it. If you use a bigger brush or sponge you can get more coverage faster, but this also depends on the look. If you mess up use a towel dipped in water with a finger to help clean up the mess.
Easy Zombie Makeup, No Brains Required
“Graagh!”
| Zombie School Girl | Zombie Face Makeup Kit |
The zombie apocalypse is coming! These undead creatures are spooking your neighborhood this year so you have two choices: beat them or join them. Remember, if you try to beat them there will be lots of running. First rule in Zombieland is Cardio and lots of it. But...if you join them, we’ve got the perfect zombie makeup tutorial to help you blend in. All that’s left is to practice your zombie moves and sounds. Remember they aren’t much for conversations so it’s really just, “Grrh” or “Graagh!”.
Easy Zombie Makeup Tutorial Video Transcript
Here's an easy way to create a not-so-scary zombie look. To start out, I took a light cream makeup and created a blotchy look around her whole face. Do not sorry about blending until all the colors are added.
Next, I took the tan color and blotched that around the face. I also did the same with a dark brown. Depending on your zombie look, you can create different shadowing on the eyes and around the corners of the nose. In order to create a sunken-in eye look, take the darker color and blend in with a dry brush around the eyes. I feel it is important to see the different texture of colors on the face, so be careful of blending too much.
Next, I wanted a nice zombie look, so I created a red lip and blotted with a sponge applicator. For a more faded look, I painted the cream color on top of the red so I could see the cracks on the lips.
Using the color wheel of the kit, I continued with the light cream to blot different colors all around her face. This look can be completed, or you can enhance and personalize to create your own zombie look. And now we have our own completed not so scary zombie look.
For this tutorial, I used a cake pan, a kitchen towel, a bowl of warm water, a variety of brushes, a couple sponge applicators, and the zombie kit.
Arrr Matey! A Pirate's Makeup Look for Me!
“Yo ho, yo ho a pirate’s life for me”
| Boys Pirate | Pirates Kit |
Ahoy matey! Ye be in search of pirate makeup ideas, ye need to look no further. We’ve got a basic pirate makeup look that will have you saying “Shiver me timbers, that’s it?” Your little buccaneer won't have trouble sitting through this one, singing “Yo ho, yo ho a pirate’s life for me” So pillage and plunder ye self a costume and pirate makeup kit that comes with everything you need. Savvy?
Easy Pirate Makeup Tutorial Video Transcript
Ahoy mateys! And now, it's time for a pirate look. Arrr!
To start out, I created lines on his face with the black paint. Next, I took a dry brush to blend all the lines, to create a scruffy beard look. As an option, you can take the small sponge from the kit to create a realistic look on the face. I suggest using this sponge lightly, but if it's still too rough, I suggest trying to find a new applicator to create a more realistic look.
Next, I did some shadowing with some black in the eyes.I did not have an eyepatch for this pirate, so I decided to create my own patch. Then, I decided to darken and enhance his other eye. If your pirate is sitting really good, you can create a line across the forehead to complete the pirate patch. I also chose to clip in the braids that would lay nicely underneath the bandana.
And here's our completed pirate look! Arrr! For this tutorial, I used a cake pan, a kitchen towel, a bowl of warm water, a couple sponge applicators, a variety of brushes, and the pirate's curse makeup kit.
Not Very Wicked Witch Makeup
“I’ll get you my little pretty”
| Girls Black Witch | Witch Makeup Kit |
Twist the bones and bend the back, Itch-it-a-cop-it-a-Mel-a-ka-mys-ti-ca. If your little one knows this they probably have a little witch in them. Who doesn’t love the movie Hocus Pocus? If they are a big witch fan, especially the classics like The Wonderful Wizard of Oz and Wicked, then we have the perfect witch makeup idea for you. It’s so simple you will be cackling with delight! It will also leave your little one looking like the glamorous witch they want to be. If they are a fan of the Sanderson sisters and Billy we have you covered too.
Easy Witch Makeup Tutorial Video Transcript
So, today we're going to create a not-so-scary witch look. To start out, I took the green makeup, and I highlighted some areas of her face, and I started to blend each area I highlighted. I did more shadowing along the sides of the nose, so the nose has a long, skinny effect.
Next, I started to add some yellow from the paint pallet along the nose, and in the forehead. Next, you can take the sponge or a dry brush to blend out the green accents. Next, you can take the blue, and add that to the eyelids, and blend it out as light or as dark as you want it.
Take the black eye liner, starting from the corner of the eye and across the eyelid out to the temple to start creating a web look. Be as creative as you like on the web as it's your personal creation. Now, you can do the same for the other eyelid, or you can choose to do something different.
Next, I gave my witch a red lip to create a not-so-scary look. This is optional, but my witch was sitting very good, so I decided to go back and enhance her eyebrows, and touch up any areas of the face.
And here's the look of the not-so-scary witch! In this tutorial we used a cake pan, a towel, a cup of warm water, a variety of brushes, a sponge, and the witch makeup kit.
Barking Simple Dog Makeup
“Man’s best friend”
| Black Dog | Werewolf Makeup Kit |
Your little one is your best friend, right? I mean you spend all your time, money, energy on them so they have to be pretty important to you. Yes, they may have ruined your furniture, clothes, and shoes but they sure to do to cuddle and are super loyal too. Wait, are we talking kids or dogs here? Oh well. Why not make your kid a cute little puppy for Halloween, then it’s like one in the same right? This simple Halloween dog makeup tutorial will transform your little one into the cutest little pup around. We’re paw-sitive you’ll love it!
Easy Dog Makeup Tutorial Video Transcript
Here I am with my son Chase, and we are going to create a cute puppydog look. To start out, I took a light brown to outline where I wanted the muzzle to be. I also brought the color up along the eyebrows. I put my hand behind his head and neck so I could create straighter lines on his face. I had a wiggly little puppy, so I suggested that he lay back on the pillow.
I blended a few different colors of brown to create the muzzle. I finished the muzzle by creating a black nose, as well as highlighting a few areas to create a more realistic look. To create a fur effect, I created some lines on his eyelids. Next, using a dry brush on the outside of the muzzle, lightly brush outward to create a fur-like effect.
To finish off the look, I added some whisker dots. And this is our cute little puppydog look! In this tutorial, I used a cake pan, a kitchen towel, a bowl of warm water, a few sponge applicators, a sponge, a variety of brushes, and the items in the cat kit.
A-ROAR-able Lion Makeup
“I’m gonna be a mighty king so enemies beware”
| Lion Costume | Cat Makeup Kit |
Simba’s the pride of the Pride Lands and there is no doubt your little one is the pride in your life. They may also be your cowardly lion. Can your family pull off going as the whole Wizard of Oz again? You could also pick different Lion King characters and create your own Pride Land. Whichever lion they want to be, we have you covered. This easy lion face paint can be done on any type of lion. The difference is in the lion costume.
Easy Lion Makeup Tutorial Video Transcript
Today I am here to show you a simple, easy way to do a lion look. First, using the brown and wet sponge, start on the outside of the face and pull inward so it gives the effect of a mane.
Next, we're going to outline where you'd like the muzzle to be. It does not have to be perfect. We're going to add some golden tones with the sponge applicator to add a little bit more color to the bridge of the nose and the forehead. Add some dark brown to the eyelids by applying and blending with a dry brush.
Next, you're going to want to take the eyeliner to make a cat eye look. Use a black cream makeup to make a nose and a mouth. Be creative here. If you need to, you can go on the top of the lip as it's less likely to get licked off. In order to set the colors, you can take the powder and put it on the sponge applicator, and lightly pat the face.
After you add the whiskers, depending on how good your lion is sitting, you can be done or, you can always create shadowing or enhance it by making some colors darker. Your lion is your own creation!
And just like that, you have a ferocious little lion. Along with the cat and animal kit, you'll need a variety of makeup brushes, a sponge if you have one, a cake pan from your kitchen, an old kitchen towel, a tiny mirror, and some warm water.
PRRfect Cat Makeup
“It’s like Black Panther Jr.”
| Black Cat Kids Costume | Cat Makeup Kit |
I taut I taw a putty tat, I did I did! A cute little itty bitty kitty. I’m going to hug you and kiss you and love your forever. If you’re crazy about cats, we’ve got the prrfect cat Halloween costume idea for you. Grab your old lady costume and dress your kids up as cats, now call yourself that crazy cat lady! To help get your children looking like the perfect cat grab a cat makeup kit and watch how easy it is to do their cat makeup. We’ll have you saying, “Sufferin’ succotash! That’s easy Halloween makeup!”
Easy Cat Makeup Tuturial Video Transcript
And today, we're going to do a cute little kitty cat look. To start out, I added some white to the eyelids and into the corner of the eye. Next, I shaped out the nose and added some curly whiskers. Then, I grabbed my sponge and started to feather on some white in between the brows. Then, you can take some white and add it on both sides of the whiskers.
Next, you're going to want to take the eyeliner and create a cat eye look. You can do the outside of the eyelid and the corners of the eyes. I took a dry brush, and I extended out the white in the temples and on the cheekbone to create a fur look.
Next, I created some whisker dots. I dabbed the top of the lip and chin for some texture. This look can be completed or, if your kitty cat is sitting well enough, you can go back and add some texture, and do some shadowing to the face where you think it is needed.
And here we have a cute little kitty cat! In this tutorial, we used a cake pan, a kitchen towel, a cup of warm water, a variety of brushes, the cat kit, and a sponge.
Ankle Biters - Easy Kid Vampire Makeup
“Beware, I bite”
| Boys Vampire Costume | Gothic Vampire Kit |
With Hotel Transylvania 3: Summer Vacation out this year there is going to be a colony of kids wanting to be vampires. Who can blame them? Is there anything more enticing than transforming into a vampire? So Dracula may be a bit creepy but it’s Halloween so it flies. Get it? These undead creatures have been around forever, literally. This vampire makeup look is an easy Halloween look to do. You can make it extra scary with blood dripping from the mouth, or just keep it clean.
Easy Kid Vampire Makeup Tutorial Video Transcript
I'm here with my son Chase, and today we're going to be doing a vampire look. To start out, I used the dark blue to enhance the cheekbones. Next, using a damp sponge and adding some white, you can lightly sponge the whole face. Be prepared to do a lot of blending. I added a little more blue to the cheeks to enhance those cheekbones. Depending on how good your vampire is sitting, you can do eyeliner to the top and bottom of the lids. My vampire was a little uncomfortable with the black eyeliner pencil, so I chose to use the black paint instead.
Next I do some white fangs on the chin below the lip. i also chose to shadow a little bit more black on his eyelids. This vampire was feisty, so I suggested he laid back. Next, I chose red for my vampire lips.
Depending on the look that you want to create, you can take the blood from the kit and have it drip out of the side of his mouth. And here is our vampire look! In this tutorial, I used a cake pan, a kitchen towel, a bowl of warm water, a variety of brushes, a sponge, and the vampire kit.
Even if your look doesn’t turn out exactly like our video that’s okay. Make this a fun and exciting experience for you and your child to enjoy together. Well, are you ready to get started? If you’re still feeling nervous most of the makeup kits come with step-by-step instructions on how to make the look. You can always modify these to fit your child. Now that you got this covered are you ready for the next step? If you are ready to take your skills to the next level we have plenty of other makeup tutorials to check out.