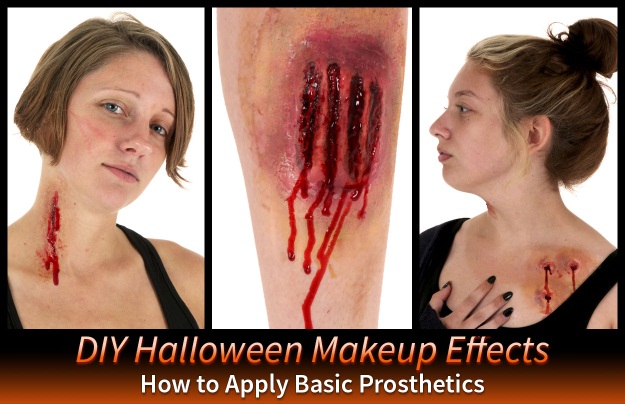
In this makeup tutorial post, we’re going to be working with basic prosthetics, as well as instructions on creating simple effects using liquid latex. All the makeup used in these looks is included in our Special Effects Complete Makeup Kit unless otherwise noted. While these look stunning, they are relatively simple to achieve!
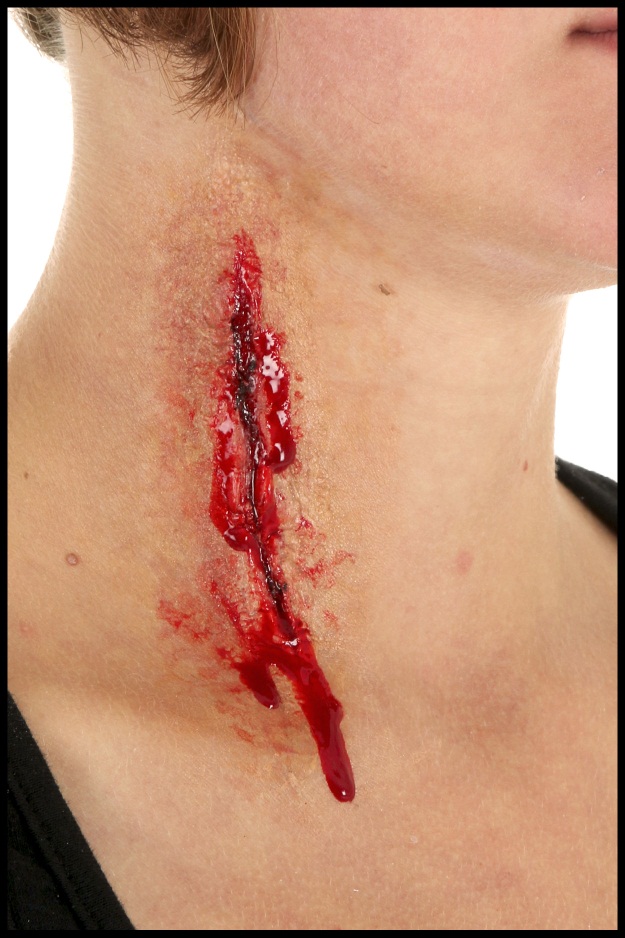
Basic Gash
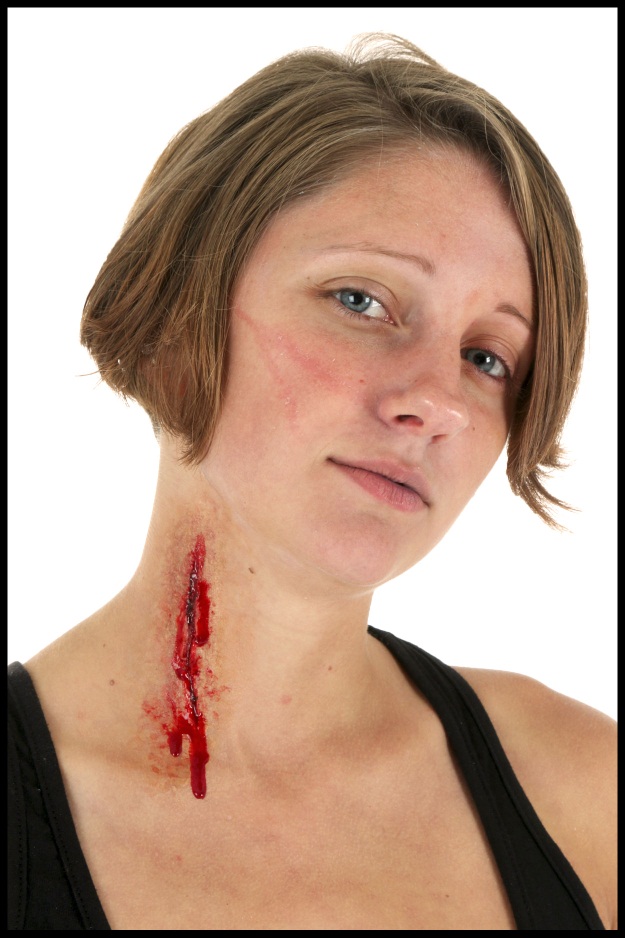
Difficulty Level: 2.5 of 5
Supplies Needed:
- Extra Flesh
- Fixative A
- Bruise ColorRing
- 8-Color Palette
- Coagulated Blood
- Stage Blood
- Squirt Blood
- Triangle Sponge
- Medium Makeup Brush
- Pen Cap
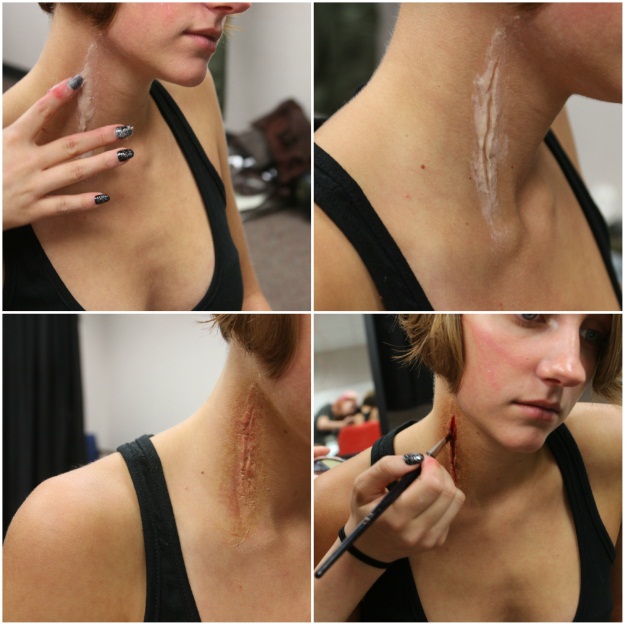
STEP ONE: Put extra flesh on the whole length of where you want your gash to be.
STEP TWO: Take your pen cap (or something similar you may have lying around) and create a slice through the center of your extra flesh. This indent will be where all the gooey, gory stuff hangs out.
STEP THREE: Put Fixative A over the extra flesh to harden.
STEP FOUR: Use your triangle sponge to stipple colors from the 8-color palette over the extra flesh to blend it into your skin tone. Use the green, yellow, and red from the bruise color-ring to make the wound look nasty.
STEP FIVE: Use the medium brush to paint coagulated blood inside of the indent you created with the pen cap. Add some stage blood over the top of that, as well as upon the “skin.”
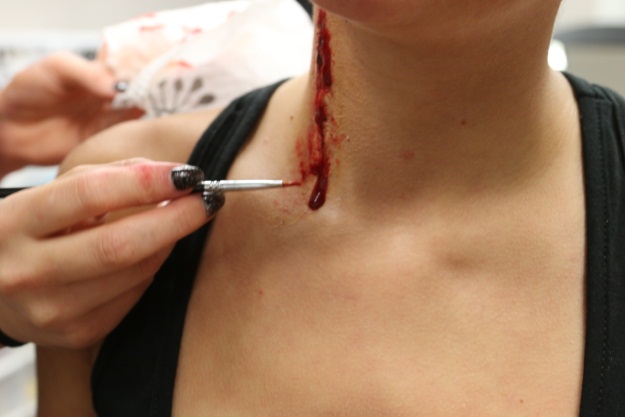
STEP SIX: Liberally add “squirt blood” in the wound, and let it drip out of the makeup effect and down your neck.
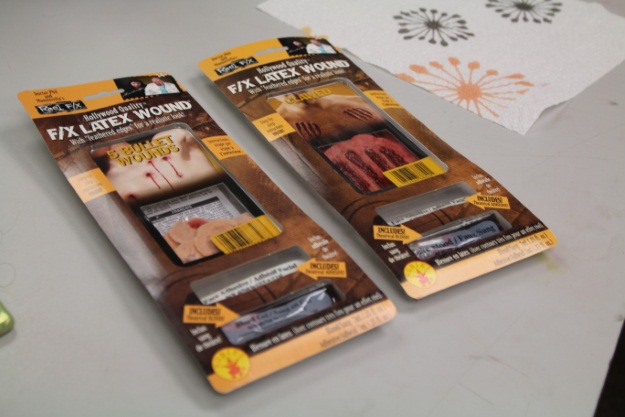
Claw Mark and Bullet Hole Halloween Prosthetics

Difficulty Level: 1.5 of 5
Supplies Needed:
- Bullet Hole Prosthetics
- Claw Mark Prosthetics
- Liquid Latex
- Bruise Color-Ring
- Skin-Tone Foundation
- Stage Blood
- Tissue
- Triangle Sponge
STEP ONE: Mark where you want the latex prosthetics to go with a little dot of eyeliner or anything you have on hand.
STEP TWO: Following the package directions, use the adhesive that is included in these packs to glue the pieces to your skin.
STEP THREE: Apply liquid latex around the edges of all the prosthetics to smooth out the edges. Place tissue on the liquid latex to further help blend in the ridges of the “wounds” to your skin. Rip off any excess tissue that’s not glued onto the liquid latex and let dry completely.
STEP FOUR: Apply foundation matching your skin tone on the edges, where the liquid latex is.
STEP FIVE: Using the bruise color palette, paint around the prosthetics with green, yellow, brown, and red to give your wounds a nasty look.
STEP SIX: Add lots and lots of stage blood.

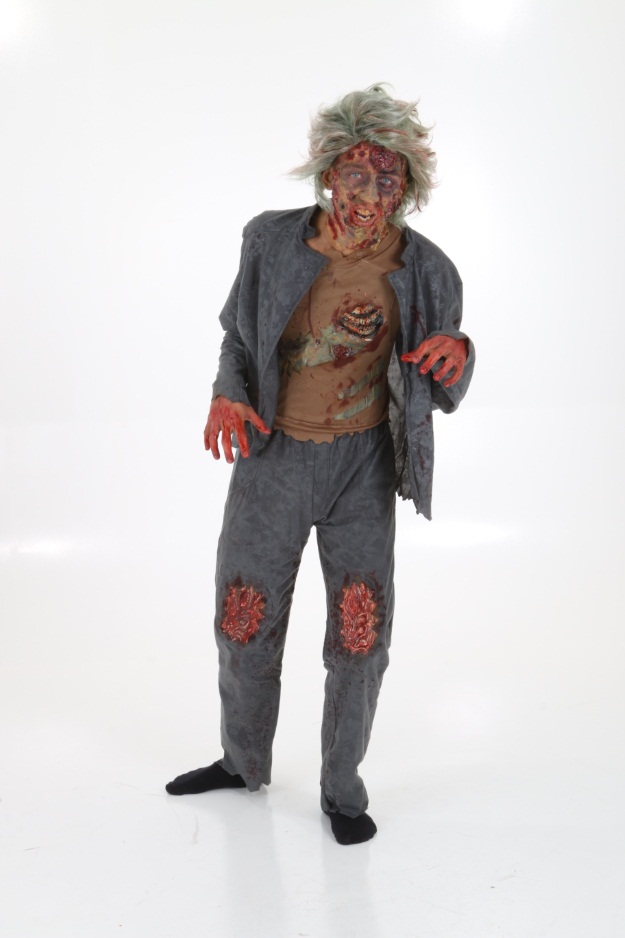
Full Zombie
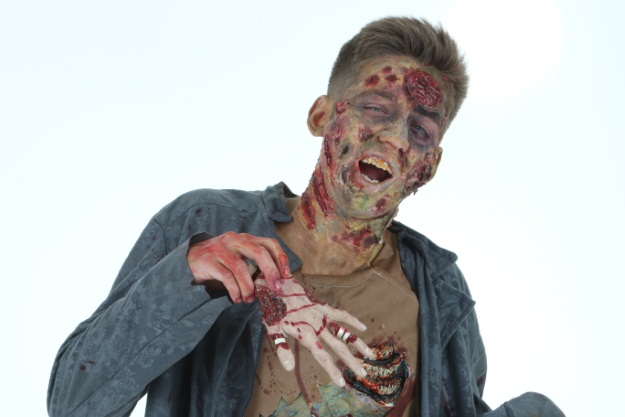
Now, using tutorials from all the effects blogs we’ve put together, you should have all the know-how you need to complete a horrifying undead creature. Check out these zombie pictures we took, which feature a whole bunch of Halloween face prosthetics, liquid latex, and face paint. And blood. A lot of blood.
Gallon of Blood Cut Throat FX Transfers