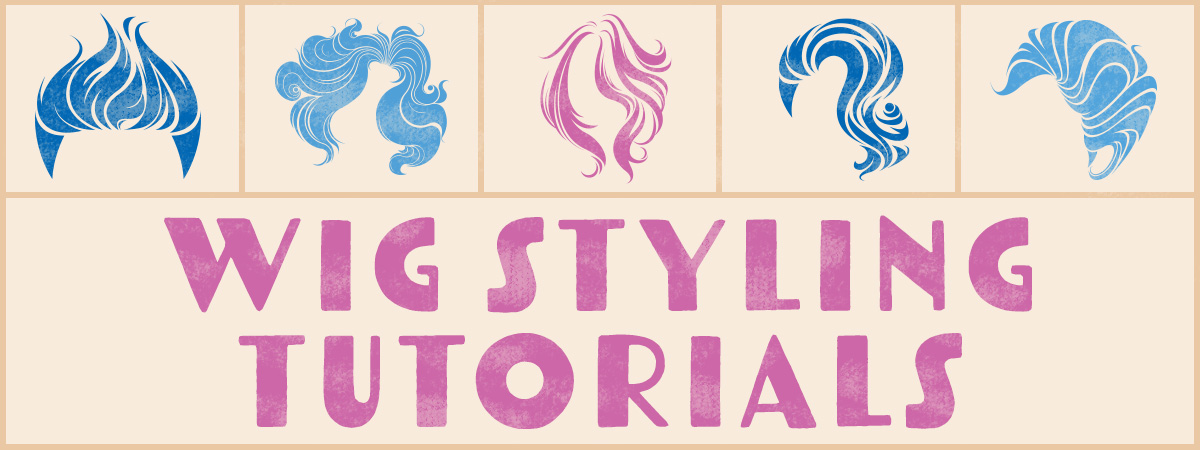
Wouldn't it be nice to have a different hairdo every day? Imagine rocking a stylish, asymmetrical bob during the week, but by the time the weekend rolls around, you'll be in cosplay sporting another 'do. You're probably thinking, "How can I make this happen?!" Synthetic wigs! No need for stressin' over your tresses, commitment-phobes! You don't have to make a long-term hairstyle switch, just throw your hair in a ponytail, grab a wig cap, and toss on a funky wig. Voilá! You're sporting a head-turning new coif without having to consult your stylist! If wigs are a little foreign to you, don't sweat it. We compiled some of the best online wig tutorials so you can ensure that your mane is always on point.
Wig Styling Tips with Miss Ava Cado
Are you ready to feel freaky fabulous this Halloween from head to toe? You already have the perfect Halloween outfit for the party, but perhaps your wig could use a little help. Costume wigs are made with synthetic fibers that don't react the same way as regular hair, so how are you supposed to tame your mane? Enter Miss Ava Cado, one of our wig styling experts, with all the tips and tricks you need to keep your wig in place and looking good all Halloween night!
1. Wearing a Wig Cap
Yes, there is an inside and an outside. The more you know!
Wearing a Wig Cap Video Transcript
Hey! It's Miss Ava Cado with FUN.com giving you some talks about wig stuff. Today, we're going to be talking about how to put on a wig cap. What are they? Are they scary? Do they taste good? The answer is: no and no.
We're going to take our little wig package, we're going to open it up like this—like a fresh bag of chips. And we're probably going to get a wig cap on a little square like this. You just gingerly unroll it. You're going to get two in each pack because these things are fragile. But, if you take care of them, they can be a life-long friend. Uh, as exemplified by my makeup drawer.
So, you're going to basically take it. You're going to put both hands in it kind of like this. You're going to want to make sure- you see that little seam in the middle? Make sure that the outside is on the outside, otherwise, if your inside is inside-out, it will look like this. Got that little seam right there. Doesn't super-matter, but for the sake of learning.
So, you're going to take your wig cap inside-out, I mean outside-in...this is the outside of it! This is where we're going to be. We're going to take our hand. We're going to kind of hold it open like that, like a cat's cradle. And then you're just going to scoop your hair right into it. I'm pressing my thumbs to my forehead, I'm holding the wig cap where it needs to go on my forehead, and then I'm just scooping back with the rest of my hands, just like that! And now you check a mirror or your phone to see if you put it on right. Hold on! Did I wipe my eyebrows off? Let's see. She's a little low. And that's what the mirror's for.
Neaten out her edges, get it as far or high as you want to wearing your wig. Basically, this is going to be just a little bit behind where your wig is going to sit on your forehead. So, my wig cap's right here, my wig is probably going to sit right here.
So! Now we take our wig. Always remember that a wig is not a hat, it is a crown—and you will put it on like one. One thing I see a lot of girls do, a lot of folks do in general, is they like to put their wig upside-down, shove their head in it, fling it back—don't do that! You spent so much time preparing this wig, you don't want to ruin it with a bunch of tangles because you whipped it around.
So, we take our wig. We hold it in the way that our head is facing. We let it sit right on the crown of our head. We take the front, and then we pull it to where we want it. And then you take the back, you find the very back of the wig (like right here), and then you whoop! Pull it right over the nape of your neck. And then you check your mirror to make sure you put it on right. ...No—and adjust accordingly. And there you have it! Your wig's on and you're ready to par-tay at your favorite costume party! Until next time, this is Ben, wig tips with Miss Ava Cado. Enjoy yourself, look fierce! Until next time, bye!
2. How to take the Shine out of a Costume Wig
Yes, you can get rid of some of the plastic shine for more natural-looking wig hair!
How to Take the Shine out of a Costume Wig Video Transcript
Hey! It's Miss Ava Cado with FUN.com bringing you yet more talks about wig stuff. Today, we're gonna talk about getting the shine out of your brand-new costume wig. You're gonna want to do this after you've already brushed it out. So, if you haven't watched that video yet, it's a couple ways back. But that's okay. What you're gonna need for this is some dry shampoo—any brand is fine. And a round brush or perhaps a paddle brush—either will work just fine.
Step 1: you're gonna take your beautiful brushed out wig, you're gonna shake this [dry shampoo] up and then you're just gonna spray right into it. You should have like a light white film on it. We're just gonna brush this through the rest of the hair with our brush. Once again, not making full contact with the brush. Don't wanna dig too deep. And you just kind of brush that in. Now, we're going to just brush it all the way through the hair. It will take some of the shine out—not quite all of it, but that's okay. We don't want all of it gone. We just want enough so that it looks a little less plastic and a little bit more like hair. So, just kind of brushing it through the bangs a little bit.
Here's just a little side-by-side comparison. Here's the side that I've worked a lot more dry shampoo into and here's the side that I haven't worked as much on. As you can kind of see, this one is a little bit duller than this side. We haven't lost any color because we haven't used that much. We don't wanna use that much, because then it will look a little dusty. That's when you know you've used too much dry shampoo. So, we have this side a little shiny, this side a little duller. That's what we're gonna do to the whole wig.
So, now that we've got one side down, we're gonna finish the rest of the wig. Get a little bit of the shine out—again, not all of it! We wanna keep some of it in there for luster. But here we go. Spray a little bit—it should tint the wig just a little bit. See how it's kind of white? That's the dry shampoo. We're gonna brush it through. Again, making limited contact with the hair. And you wanna make sure you brush just about all the little white streaks out—unless you're into it. Free highlights, I don't know. But just note it will come off as dust later if you leave too much sitting. We're gonna add a little bit more—just a little shiny.
And if you see, if it's a little bit tinted gray, that's kind of what you're looking for because that's the luster getting removed. That's just the dry shampoo sitting on there and kind of absorbing some of the light instead of just reflecting off of the plastic fibers. So, let's see. This side with dry shampoo, this side without. Side-by-side. And, after doing all of the little brushing and putting all of the dry shampoo, brushing it through the fibers as you need to. If it's still a little shiny on top, fret not! You can always do a little light dusting of your dry shampoo on top and just kind of work it in with your hands. As you would with normal hair. Again, don't dig into the teasing, she will fight you. We're not here for a fight, we're here for a good time. I'm just working it all the way into the fibers with my hands.
So, on top, we have it a little bit milder, it's not shiny anymore. At least, it's not like blindingly lustrous. It's always going to look a little bit shiny but that's a-okay because it's a wig. And also, hair is shiny, so get into it. I'm going to work a little bit more into the ends because she's still a little shiny back here. And again, I'm just going in with a light dusting—you want it to be a little tinted white but it doesn't have to be like fully dusted white. And I'm just working it in with my fingers at this point. And again, you want this wig to be brushed out. If you run into a tangle, just stop. Pull your hand out. Get into it with a brush. Because plastic fibers will tangle at what? The drop of a hat–the drop of a wig, perhaps.
And again, I'm never digging the brush in too deep because then it will just yank the wig right off the head. You just make contact like this. Light contact is your best friend. And this is the final result. Again, if she's too shiny, add a little bit more—figure out where you like the shine to be. Until next time! It's been Miss Ava Cado with FUN.com. Bye!
3. How to Detangle a Synthetic Wig
Fresh out of the bag or refreshing an old wig, there may be some tangles to tame.
How to Detangle a Synthetic Wig Video Transcript
Hey! I'm Miss Ava Cado working with FUN.com to bring you some tips about wigs and stuff. Today we're going to be working with this lovely Women's World Traveler Wig. What you're going to need for this today is a paddle brush, or like one like this with the little handle—these are my favorite. But if you've got one like this, this will work too. Little bit shallower but she'll get the job done. A nice little wig stand, and a head. Now you can get one of these wig heads at any craft store. You can get one of these stands...I'm not sure where. But, if you find something you can stand the wig head on, that'll work just fine.
What you're gonna wanna do first is remove any jewelry that might catch on your wigs—because it'll catch. After that, take your brand-new wig out of the bag. Just imagine she's brand new, she's been through some stuff. You're gonna see a pile of wig, and then you're gonna see a net. You're gonna just gently take the net off and you're gonna keep this, because these are precious, precious gold. I can't find them in stores anywhere. And you're gonna use it to store your wig after you're done zhuzhing her.
We're gonna put the wig on the head first. Pin her in there with some sewing pins perhaps. I'm using these long uh, I think they're called...well, it's not the corsage but the...boutonniere! These are boutonniere pins! Because they're nice and long, they'll hold the wig sturdy on there. I've put about three in there, so this way, she's not going anywhere while we're doing our brushing. I'm gonna take my round brush and you're just basically gonna take it end by end. And pull a little section out, a small one, don't be too ambitious. Don't take half the wig—just a nice little section. And you're gonna just take your paddle brush and work it from the ends. Remember this isn't real hair...I know. This is plastic. So, she's gonna tangle at the drop off a hat. But! If you're really, really gentle with her—and you should be—then she will not fight you too much. She's been hurt before.
I'm just working my way in from the ends all the way to the roots. Some of these wigs, and this one I think especially, has something called perma—teasing in it. It was made with teasing in it basically, little tangles that we don't wanna remove because that keeps the zhuzh in place. But we do wanna get all these little spindly parts to look more like real hair. So, as you're getting brushing in towards the roots, let's see. You can kind of gather a little bit more hair. So, this is kind of how... here's a side by side. We've got tangles on this side. We've got a little bit smoother on this side—a little bouncier. And you're gonna do this for like the whole wig—so, put your favorite Harry Potter movie on or something. It's gonna be a longer haul, but just gently go through it with your round brush.
As you can see, I'm kind of like taking it from underneath and just brushing it out. You can go over too, doesn't matter—as long as you're gentle. Ooh! And already you can kind of see that these little spindles had a mind of their own and are making a nice big voluptuous curl. These are the ones we want. Whereas these one, they just happen. They just happen to wigs after a while, and that's okay! Cause that's why we're taking some care of her. So, work your way in gentle and slow. Oooh sing a happy working song!
And once again, this is gonna take a while. And you don't have to work all the way to the roots. Again! There is some factory teasing in there. You don't want to hurt it, you don't want to disturb it. Cause she's natural—she's part of the ecosystem. Just want to get the ends nice and bouncy and neat so that we can just put her on and she'll look great. Make sure you get the undersides too. If you see, I've got the surface right here. The surface is fine, but underneath, we still have quite a few spindles. We want to get all those too. Or if you're not feeling so thorough, you don't have to be. As long as you like the look of it. If you're ever wondering if it looks good or not, put it on your head! Find out!
Hi! Just a reminder, make sure you're starting at the bottom. Every. Single. Time. Cause that—if we start up here, watch what happens. She fights us. Because we're not being ginger. We're not getting into it slowly. We have to romance the wig a little bit first. And that's okay. She doesn't know us. You can kind of see I'm just grabbing beyond it and then pulling back. This keeps the wig head from tipping over on ya. Those of you that have had long hair in your life already know. But those of you that have mostly had short hair your entire life, might have to realize that you don't want to yank this wig around too much. We don't want to hurt the wig; we don't want to pull out any hairs that we don't have to. And as you can see by my brush, sometimes hairs just come out—that's normal. Don't be worried about it. She'll still look gorgeous—as she does.
Kind of a nasty little ball of perma-teaseing right there—if you can see it. So, we're just gonna... we're just gonna take those top hairs that are already smoothed and just kind of like guide our brush gently. Look at how much contact I'm making. Just barely touching it and then—woop. Gingerly. Gentle. Ok, just a side-by-side comparison. Here's one side pretty much done; here's the side we haven't done yet. Do you see the difference? She's bouncy, she's flouncy, she looks a little bit more like hair rather than tendrils. And again, this is normal. This just happens after a wear or two. So, learning how to brush your wig is essential to owning your wig.
And I'm just kind of taking my hand, taking my brush, at the very bottom now that I've got this huge section all brushed out. I'm just brushing out the end and then I'm taking my fingers and separating them—like this. So, brush and separate. Brush and then separate. Because we want it to look like little locks. We don't want a huge wad of hair. And there's a point where I have to like—maybe your wigs can't be saved—but this is...This is far from it. I've had a couple wigs that are just completely fried. They look like little corkscrews at the end. That's when they're beyond saving.
So, notice I've got kind of a bigger section in here. You can still work with bigger sections—it's just not very...you don't ever want it to be wider than your brush. It can be deep though. So, if you're brushing through your wig and it's just stopping. Dead tracked. Doesn't want to move any farther. You just take your brush out by peeling it away. And then you just take the very, very ends, find that tangle, and undo it. Cause that means there is some kind of nasty tangle in there that does not want to be trifled with. And so, you just gotta gently pull, by going to the very, very ends and then working your way back in. And then I like to gather the whole back of the hair, eventually, just kind of make it fuse into one piece. Brush through that a little bit.
Once you've brushed most of it, you can...GENTLY, brush through the top of it to kind of get all those sections to merge again. Last time I saw a wig like this it was my friend's who wanted me to fix her...I don't know she had it like for five years. Just a little wig that she put on top of her ponytail to make it look like a ponytail—this is a drag queen. And she shook it so much that it ended up looking sort of tendril-y like this—our friend here in the very beginning. And she's like, 'can you fix it?' I'm like, 'I guess.' Cause this was...This wig is nice, she doesn't have a lot of product in her. But she's...The other one had like hairspray, and weave bond, uh...Sweat—drag queen sweat. Loose dollars from five years ago.
Alright, let's see. Once again, if the tangles fighting you, just go back to the ends. That's where your friends are. The ends are your friends. So, you can see in the little hole, like right here. Don't worry so much about it. I'm...you're just gonna take your little brush, you're gonna take it at an angle, and you're just gonna kind of take the very outer most parts. Barely pulling along and that just organizes the hairs on top.
Now especially for these uh...for these pre-styled wigs. You want to look at the...at the front it will tell you which way the hair wants to go. Cause the hair is styled. These wigs were made with a hairstyle in mind. So, this girl, she likes the middle part. So, we're just gonna keep that there. So, we're just gonna brush the hair the way it wants to go. You can kind of see that by looking at the tracks at the top. Which way the hair wants to go. If you see some gaps in the tracks, that's no biggy. It will still look like strands of hair. So, at the end of the day this is for a beautiful costume. But people are gonna look at this plastic wig on your head and they're gonna be like, "WOW. She's a natural redhead tonight. When did you have the time for all the dye?"
And now just get the front face of it. I'm gonna remove these pins so they don't get tangled on nothing. And then we just brush and brush. Just kind of brush your bangs out of her face—they don't want to be there. Once you've got her in kind of the way you want her—and let's do a little look around here. She's giving international woman of business. She's giving undersea uhh, princess—no copyright. And she's giving—she's very much giving right now. So!
And this is the final result! All that's left to do is take some hairspray, get those loose hairs out of your eyes. Put her on and go to your Halloween party as the women's world traveler that you were always meant to be. Like this video? Need more tips on wigs? Please leave a comment! I'd love to answer any questions. Until next time, muah.
4. How to Cut a Costume Wig
If your bangs are in your eyes or you don't like the length, cutting your wig is always an option!
How to Cut a Costume Wig Video Transcript
Hey! It's Miss Ava Cado here with FUN.com. Gonna talk to you today about some more wig stuff. What we're gonna talk today about is cutting your wig. So, first of all, here are the things you're gonna need. A mirror cause you've gotta fit it to your head. A paddle brush or a round brush like this with the handle. Not super important what kind. Just make sure it's got a nice little flexible bristle. Then, a pair of scissors that you don't care too much about. Once again, this is not real hair, this is plastic. So, it's gonna fight you at every turn and it'll probably ruin whatever scissors you're using. So don't use any that you care about. So, give me a second while I put all this gorgeous red hair into a wig cap.
*Clap*
Alright, now that your wig cap is on—we have another video for that if you're not sure how. I'm gonna put this wig on my head so that I can cut it accurately to my head size. So, let's take her off the head. If you have any reservations about stabbing your wig head in the face with a pin, don't. They've been training for this. Make sure you've adjusted your little bands in the back, I like to put mine on the outer edges because I've got a big ol' head. This'll also help you see just kind of how the wig fits on its own without any styling or teasing or anything like that. The wig bands love getting tangled on everything. So, just beware!
So, woop. I'm not sure she's my vibe, personally. You know what? She doesn't look bad. So, the reason I put it on my head is so that I can accurately cut it to exactly where I want it. Because this wig, I thought, was kind of the perfect color for Raven from Teen Titans. The cartoon one, not Go! I mean, also Go! I guess, she has purple hair in that, right? They're like the same.
Basically, I'm not cutting the wig fully on my head. I am just making sure that I get the front places, cause she's got the two little dangly's in front—it's kind of like a high-low style. Oh my gosh, it's getting in my lashes! It's kind of like a high-low style, so I want to make sure that those front two locks are really nice and placed. Cause if I cut it too short, I've got a big head. They'll end up like here and also off-kilter.
So, you just go in with your scissors. Important thing about cutting, never just chop perpendicular, like this! You want to always cut at an angle so that the hair kind of falls naturally. Unless you want it to look all choppy, that also has purposes. But what I'm gonna do, is I'm just gonna cut off a little lock right here. Cause I kind of like where that length is. I'm just kind of easing it. Woop. Oop, oop, oop. Bleh. Have a waste basket near you for all of these little droppings because there will be a lot!
Let's see. This is other notch. Try to make them even and don't cut too far in cause we're just make—we're just marking. We are just marking right now. Truly, I don't think purple's my vibe. But haha. So, I did cut a little notch out of this side, but I didn't realize that I had more hair tucked up in my wig cap. Always be mindful of how you put it on. Lift up your edges, make sure there's nothing tucked in down there, cause that'll affect the final result. I'm gonna make my new notch again—she was right there. Take my scissors. This is quite a bit of dext...dextrous...whatever the word that you're doing. Because you're like holding...I'm holding my hand backwards. I'm just trusting that the mirror is not lying to me. Alright!
Now, ugh, I'm gonna let all my beautiful red hair back out and put this on back on the wig head. Now that I got my two little notches right here and right here. Let's see if they're even real quick—hold up. Alright. Alright! Yeah, that's kind of even. Right there. Boop. It's taking all my willpower not to hairspray her just a little bit but...we don't wanna hairspray her yet cause we're not done cutting. Alright, so we kind of have our little front locks that I've marked off—oh! I'm gonna put my—excuse me! Let me let my hair out.
Alright. So! She's back on the wig head, we have our two little sections you can kind of see them. We're basically going to...cause Ravens got this sort of...it's not a Karen haircut but it's a little bit of a Karen cut. It's a bit of low in the front, high in the back. So, we're gonna try to accomplish that on this tiny head. It may look a little wonky on me once we're done because my head is bigger than this. So, if you have...if you happen to know your wig size which we can get into in another video, then buying a wig head of your own size is pretty important if you plan to style a lot of wigs.
So, what I'm gonna do is I'm just gonna take that section that I've already leveled out. And I'm just gonna keep cutting back. Remember! No perpendicular straight across cuts, diagonal cuts. Kind of cut towards, towards the...top of the wig. And I'm kind of giving it levels a little bit–what that means is I'm starting a little farther down and I'm chopping a little farther up as I go. So kind of like this: snip, snip, snip, snip, snip, snip, snip. Woop.
She's kind of got a high-low. We'll try to get the basic bull that she's got all the way around first. And then worry about the level and the high and the low. Usually best to get it to the length you want it first and then mess around. So! Important aspect of the chopping. We're going to grab our section before we cut it so it's nice and taut. That way, we're not just chopping into it willy-nilly. Then we take our scissors, diagonally, not—this is perpendicularly, we want diagonally. Like that. Or kind of how we want it to fall like this way. And then we're going to go slowly go upwards as we cut like this. I think I might've gotten more than this section. Whoop.
You see how she kind of just made a nice little lock on her own? That's the goal. You may encounter sections where you have a lot of extra hair. Be cautious so that you don't make too big of sections, otherwise you may end up with a really chunky looking wig. And too big of sections is any wider than your finger, probably. One last little section—diagonally cut. 'Wah' Come on. Okay!
So now she's a lot closer to the length that we want. Let me see if I made it even. It's looking in the back like I left it a little extra, extra-long. So, we're gonna cut that down just a little bit. Remember diagonal cuts! It's supposed to kinda look a little choppy like this cause that makes it look more layered and like real hair. And so, let me just cut her down just a little bit. I'm gonna gather these long sections, just by the tips and kind of cut them a little diagonally. Whoop. Make sure you're always reaching to the undercoat. That's where the extra-long hairs like to hide.
Now, looking at her from the front, she's a little lopsided still. We're just gonna fix that—just look at her head on. You can probably see where the unevenness is as long as she's still nice and brushed. I'm just gonna...I like how long it is in the back, though. But I like how short it is on the sides. So, I'm just gonna...I'm gonna try my best to make a nice little diagonal gradient.
Ok! So, looking at her from the front again, we kind of have a nice little even bob again. Basically, the main thing you're gonna have to do is just look at her from all angles, spin her around a couple times and make sure she is the evenness that you want. And because this is a wig, and this wig doesn't exactly uh...fit my head because the standard size. My head is not a standard size. Basically I'm gonna leave the back a little bit long because if I expose—'cause if we did a true Raven thing, she's kind of got that under buzz cut thing and then her bob comes over it. And so, we're just gonna have to suspend our disbelief a little bit and leave it a little long in the back so it covers all of our real hair. So, I'm gonna put my hair back into this, a wig cap, so I can try this on and see her length—how it looks on me. Alright, one second.
And this is the final result, kind of. I sort of like how the length turned out, she's very—she's very Raven. I left it long in the back so that we don't have to see all of my um...gorgeous red, natural red hair poking through. What we do from her is kind of tease it a little bit, give her some volume so she's a bit more Raven-shaped. Cause I kind of want her to fall a little bit more like this. But that will be another video. That's how to cut a wig. Make sure you do diagonal cuts. Make sure you just use some scissors that you don't care too much about. And relax. Relax. Always cut less than you think you need to. So, until next time! I'm Miss Ava Cado with FUN.com. See ya next time! Muah!
5. How to Straighten a Synthetic Wig
Did you want to change the style of your wig? Straighten it out and try something new!
How to Straighten a Synthetic Wig Video Transcript
Hey! It's Miss Ava Cado with FUN.com here bringing you another little chat about wig stuff. Today what we're gonna be doing. We're gonna take this lucious mane, we don't want her curled anymore—she's boring us. So, we're gonna straighten it out. How we do that with synthetic? We can't use regular heat tools because it's not real hair. Hair likes to behave, plastic does not. And so how we do that is we super heat it, with steam. Little bit by little bit.
So, what you're gonna need today is your round brush again—just like the one we were using to brush it you. You can use the paddle brush again; just make sure you have a handle so you don't get too close to the steam. And of course, our steamer. Any garment steamer will work, as long as it has a little thingy so you can get it like right on the hair like that. So! Without further ado, let's wait for her to boil—again. I turned her off a second ago.
Oh! She's ready. So, much like brushing your wig, you wanna make sure that she's completely detangled before you try this. Once she's ready, you press it into the hair, you pull the brush down and you just kind of guide it. You see how she's already giving up the ghost on that curl? And there you go! That's our first section. We're gonna keep going.
You're gonna see me kind of work my way from the top since I've already detangled this. But if you haven't detangled it, first detangle it. Don't bother until she's fully brushed out. And then I'm using the steamer as kind of an iron in itself and pressing it against the hair so I can really get all of that curl out. Because the heat and moisture is what changes the curl of the hair. Heat tools probably work at a certain temperature, but I don't use them because I don't know how hot I can get before it starts burning. But I do know that if something is wet, it can't burn as easily.
Whoop. Taking a little break because I found a tangle. Whenever you find a tangle, stop. Search. Destroy. Oh! Look at the difference so far. One last lock, here we go. Heat.
And steaming kind of works the same exactly as heat tools so you can really use to shape the hair like you want it to get out of the way of your—of the front of the face. You can just press it in, guide it along. Let me show you what that looks like a little bit. Pulling the hair away, steaming it into place. And then she just kind of falls that way.
The real tricky part is if you don't want to cut this, you have to get all these bushy, bushy ends together. Because as you can see, some of them have not agreed with us. So, we're just gonna take a little extra time and get those nice and neat. Pull this little tangle out that didn't want to cooperate with us. Don't panic if you're losing hair—it'll be fine. And I'm just using the brush to push the hair down and then using the steamer right above it to press it flat. Alright!
And there you have it. She's completely straight. So, from here you can do what you want with it. You can recurl it if you didn't like the old curl pattern, or you can start cutting her if you liked her...if you need a new wig to uh...a new wig, say she's for...I don't know, Raven perhaps. I googled characters with purple hair and she's the first one. And probably the only one. You know! Alright, and there you have it. A perfectly straight wig. Come back next time for more wig tips with Miss Ava Cado here with FUN.com. Until next time. Muah! Byeeeeee!
6. How to Add Volume to a Costume Wig
Is the wig netting showing through a thin wig? Adding volume can help with that!
How to Add Volume to a Costume Wig Video Transcript
The drag queen falls in the forest, and no one is around to hear it. Does she slay? Hi!
Welcome back. I'm Miss Ava Cado here at FUN.com here to talk to you about some wig stuff. Today what we're gonna be talking about is volume! We've bushed this girl out. And now she's looking good, but she could use a little bit more volume. So! What we're gonna do today is some basic teasing. Nothing crazy, plastic hair loves to tease so it won't take too much effort.
What you're gonna need for this is a little teasing brush, like this. You can get them at Target (not sponsored), Sally Beauty (not sponsored), Walmart (not sponsored), whatever (not sponsored), for like...three dollars? They have a nice little pick for separating sections right there and in the front, we have nice bristles which are perfect for teasing. I have a couple other teasing brushes—this is a teasing brush, thi...uhh...this is a teasing brush. As long as they have these nice bushy bristles, they will tease just fine.
So! What we're gonna do, is—she's a—she's looking pretty good. She could use a little bit of volume. Specifically, like right here. Like all up in the crown. So how we're gonna do that. We're going to, take the end of our little brush, we're going to take a tiny section. Some of these wigs might have what's called perma-teasing in them—that's factory teasing that was added unconceptionably. We're going to tease around that, add a little bit extra volume. Cause we're those girls at the party.
What you're gonna do is hold a section of hair taut and then you're going to take your little teasing brush. You are going to basically wipe from the middle all the way down, whoop, to the crown. And you're gonna do this kind of in a little fast sweeping motion kind of like this. Once you've done that like once or twice, you're gonna pull all the way out. Whoop.
Basically, what we're doing—whoop. Pull all the way out, down, down, down, down. All the way out, down, down, down, down. All the way out, down, down, down, down. All the way out, down, down, down, down, down. All the way out, down, down, down. All the way out.
We're basically making a big bubble of knots in the hair. Once again, plastic loves to just tangle. So, we're not going to have to try too hard to get it to tease. After that, I just take our little wig lock that we just teased and I like to brush out the ends, gently—with our brush so that we can keep our ends neat. Cause we—we're trying to add volume, we're not trying to make a mess of the wig. And we are tangling it, so that might make a little bit of a mess. But just look at how much volume we've got so far—that's just hanging off the head right there. So, we're gonna try to make the other bits match.
One thing that you can do if you're teasing it a little bit above the head cause it kind of just—like a sad rabbit ear. We're going to take our little pick end, we're going to just push some of that down towards the roots. Cause ultimately, ideally, all of our teasing should be at the roots. And that is kind of laying a little bit flatter. So! We're going to take another section right next to it and I'm just kind of like using my finger as a hook and just 'whoop' grabbing a little section about as wide as this brush honestly.
Work in smaller sections; they're easier to tease. If I just grab a whole wad of hair and tease a bunch of it, then a: it's not gonna tease very well, b: like you're gonna get like all kinds of knots that you don't want in the hair in random places. If we have a smaller section, we can just control where all our teasing is going a lot better, so, small sections. And also, how are you gonna brush the ends out at the end if you've got so many so many knots in it? Alright! So, there's another little bubble of teasing. She's kind of turning away from you but that's what we're working with. Ba-bam!
And if it looks a little crazy as we're going—and it will—uhh... don't worry about that because we're gonna do another process after we tease called smoothing. So, here I go, I'm just gonna keep teasing up the full crown and get right back to ya.
As you're doing this, make sure you're always holding it nice and upward cause that's where we want the volume to go. Whichever way you're holding the hair as you tease it is which way the dir...the volume is gonna wanna...the teasing is going to want to stay. So the hair will be holding out like this if we teased it that way, the hair will be holding much higher if we tease it straight up, so.
Not that holding it out or anything is bad, it's just for different purposes. This girl, she wants to go up. I'm kind of taking the top of the brush and just kind of very lightly skimming across the top, not digging it at all, just making it smoother.
Okay! Kind of got some volume all the way around as you can see right there. What I'm gonna do, is I'm just gonna smooth down the top cause we've got a nice amount of volume now, but as you can see kind of—maybe you can see from there. We've got a lot of knots just kind of sticking out, hanging out. We don't want those there—unless you do. Unless you're being like, the little mermaid who fell in the garbage can as your cosplay—which is valid! And kind of iconic. But we're not doing that right now. So, we're smoothing out our knots.
See how I'm kind of like diagonally making contact with the hair? I'm not digging in, I'm not digging in very deeply. I'm just taking the hairbrush and putting it sideways and just dragging it across the top. Just evens out those nice little top hairs—whoop!
Sometimes those knots are going to especially not wanna go until we use our brush straight down and just kind of pull straight out. So, we preserve our volume while getting rid of the knots. Okay! She's becoming something. Not gonna lie to y'all, I did not go into this with a vision so she's just kind of telling me what she wants right now. And for the most part, if you go into a wig with—styling without any plan, it'll tell you how it wants to lay. They have all these extra little curls already in them, they've been cut a certain way or something like that, they'll tell you where they wanna go.
So, it's that part of the episode where I'm going to now use a tool that I forgot to mention earlier. You're going to want a pick like this, it's got that diagonal shape, or like this—the straight shape. All they're really necessary for is pulling the teasing where you want it to go. So, you can kind of see, if you look at her straight on, she's got kind of some places where we'd like a little bit more volume. All our teasing that we just put in is going to help us shape her how exactly we want her.
So, I'm just putting the pick in and pulling in a direction that I want her to go. Kind of smoothing her over afterwards. Sometimes you might have to get in there with your hands. And this'll also counter any volume lost by our little smoothing process. And wow! At this point, she's kind of giving us gogo dancer. Like 60s mod gogo dancer. So, I think that's where we're gonna keep her.
For the rest of the teasing, I think maybe the bangs would be another place that we wanna go. So, I'm going to take our bangs—they're already laying kind of nicely. So, we're gonna take a little small section of our bangs, we're going to lift it upwards and tease right in this little corner pocket because that's where it's going to be able to hide so we don't see it on the top of the head as much. So, here we go. Brush it down, push it away. Brush down, push it away. And gather our whole section up, neaten out our ends. Whoop.
Ooh! I like how much bigger that got, okay. So! I'm gonna take the rest of the bangs, tease underneath them. Will this feel prickly against your face? Yes? But that's kind of the wonderfulness of wigs. You never forget you're wearing them. I'm kidding. If you've got a wig and you're feeling good, usually when the look is together you feel good. Just neatening out these ends again and then we're going to marry it to our other bang section by neatening the ends together—kind of brush them together a little bit. Oo! Look at this volume! Alright! Good volume comes from very, very thorough teasing which is kind of what we're giving her today.
This one, I'm going to tease from behind, let me just turn it back. Same way that I was doing the other ones kind of, actually. So, like here, teasing into the pocket where we won't be able to see all that nasty knotting. And then marry it into the section by brushing our ends together. So, let's look at it from the front. Or I'm looking at it from the front—it's a secret to you. You don't get to see it. No, I'll turn it around in one second. So, you see how much extra volume we've got? My gosh.
Say that you're doing some kind of 70s disco look, this would be perfect for that. Perhaps, a drag uh...Ariel, Little Mermaid kind of thing. All that's really left to do now is just kind of shape the bang to where we want it. Because of all this teasing in here, we can basically just play with this now. And just make her lay exactly how we want to.
And I'm just kind of shaping it how I want it—she always wanted to have a little, cute wave away from the face 70s middle part, so we're just gonna let her do that. Ugh! Alright. Now just look at the difference between those sides. We've got wah wah and now we've got va va vooom! So...so, we're gonna do what we did to the other side on this side and it's gonna look nice and voluminous in the front. I think the official title that I'm gonna go with for this wig is disco Ariel. We're in the era of reinterpreting Disney princesses so let's give her a decade that we love.
Taking another small section, towards the front of the head, brushing right into that crevice. Brushing our ends out, keeping them untangled, just the ends. You can leave all the tangles at the base, that's where we want them. So, here's a little preview of the full thing. See how she's just ba-bam now? That is my favorite part of wig styling, is just making things look ridiculous, if you want to look less ridiculous, all you have to do is tease it just a little bit less. That's basically the same process we were doing but with a little bit more smoothing. So, we just wanna, if you wanted to make her a little bit smaller, you could push it down. The teasing will listen to ya. Pushing her down. Pushing down.
Keeping my hand pinched right here because that's where we want it to arch. Just kind of—this time, I'm digging into the hair, kind of like this. So that I can actually catch some of these hairs and pull them out. As long as you've teased it gently, they should wanna cooperate. If you teased it too hard—which is very possible because teasing is kind of a rough process—then um, don't fret, just keep smoothing. She'll go the way you want to eventually, but it may be a lengthy process.
I really like where she ended up, actually. This little middle part is really, really cute, and so I'm gonna keep that. What we're gonna do now that we've teased the whole thing—we've added a little volume to the crown. If you want it to be like really,really big then you can go through section by section and tease the entire thing down to the bottom of the wig—we didn't do that today because we didn't wanna.
Aright! Well, I like where she's ended up—which usually means that we've teased her enough. So, she's kind of come out a disco Ariel. So, you can shake her around, dance into the night. What we would do now is start the styling process with some hairspray, but that's another video. So, until next time, I'm Miss Ava Cado and this is FUN.com. Talk to ya later, Bye!
7. How to Curl a Costume Wig
If you want a very specific character wig, sometimes you just have to do it yourself.
How to Curl a Costume Wig Video Transcript
Bonjour! It's me, Miss Ava Cado here at FUN.com talking to you about some more wig stuff. Today, what we're gonna be talking about is how to curl a wig. This is a little bit more advanced for any of you ambitious people that bought a straight wig or had a curled wig, didn't like the curl, took the curl out, and want to re-curl it. So, what we're gonna do today is we're gonna take this cute little silver. She's a um—let's see. She's a Dream Girl. And we're going to give her a nice cute little vintage curl is sort of the goal.
You're gonna need a lot of stuff for this. So, feel free to get out your notepad right now because there's a lot of stuff. Hi! So, for this you're going to need some push pins, these are the boutonniere pins—I remembered the name this time. You're also going to need a round brush. You're going to need a comb—a rat tail like this, it has a comb on one side, it has a long pick on the other side. You're also going to need some rolling papers—these are basically wax paper that you can just curl around the hair. We'll get into what we're doing with them soon. After that, you're gonna want some rollers—some wire mesh rollers specifically. Because these are good for resisting what we're gonna do with them, which is, we're gonna steam it. Nice and hot to get the curl to stay because wigs don't like heat tools very much. We'll get more into that later. You're gonna want a squirt bottle as well and a mirror for checking how beautiful you are after the whole process is done. Back to you, other Ava!
Let's get into it. I've already put our wig on the head. What we're gonna do first is we are gonna section off the front of the wig. What I mean by sectioning is we're just gonna like take our finger, we're going to kind of start at the very top here like toward the front and we're just gonna take a nice section all the way to the ears basically—oh no! I didn't pin her in. Hold please!
Okay, so step two is put—make sure you pin your wig on. Step one is put the wig on the head, step two is pin it down cause she's gonna shift—a lot. You're gonna wanna make sure you catch this little band where the wig is, you know, where all the hair is attached. And then I also like to do at least one at the very back of the nape of the neck like right here. Just to keep it stretched and downward. This girl is long, so she is trying to fight me. Don't fight your wig stylist. And now that I've simply messed her up, I'm just going to brush her a little bit.
Back to step three which was sectioning our wig! So, I'm gonna take my finger and I'm just going to go right where I want it and kind of dig behind the hair. Get a nice solid front section—this is going to be the front of our hair. It's going to be the nice hair that we roll just straight back. You see how I've kind of got a triangle wing sort of happening right off the front of the face? So, you kind of want a nice little straight line—you don't have to have a straight line, it's not super important. But the neater your sections are, the neater the final result will be.
Now, you don't have to do this part. But I like to do this part. I like to braid the wig so that I can just kind of make sure these hairs can't just flop around and get in the way of everything else. You may also want some clips to keep hair out of your way—this is an alligator clip, cause it looks like a little alligator. And I'm just going to scoop that hair back and around so she's out of our way. I'm gonna take my little three-pronged hand—I go in with it at the wig like this. And I just, whoop! Grab three little sections of hair. I take my middle finger, I pull the middle one under, I pass the right one over—the left one over. And then I just kind of do this, feel free to slow this way down if you need to. If you've never braided hair before. If you have braided hair before, I'm sorry I'm coddling you, I'm just making sure you know.
You just kind of keep braiding, braiding, braiding, braiding, braiding. And you don't have to make it too long, cause we don't want it that long, but boop! There's our first front section, I'm going to do the same thing to the other side now. Generally, these costume wigs don't have a whole lot of hair in the front—I mean they do, they do have a lot of hair right here or wherever the part is. So, you won't have to fight with it too much, and you'll notice that one side of the front part is a lot more sheer than the other side. So, this doesn't matter super, but just make sure you're getting that entire front section cause that's going to be—basically, our nice little wall that'll block the view of the rest of the sections.
So, now I've got our two front sections, she's giving us a little Pippie Long Stocking, and we've got all this like back section now which is where we're going to start curling our wig. Brushing it out. Cause again, the wig will tangle at any, any opportunity. Just so you know you're not alone in this, this is how much hair I've lost so far. That's normal. You'll be fine, I promise.
So, now we've come to the point where we are going to start curling. For this you will need: a little rat tail comb. What you're gonna do is you are going to trace around the very top of the wig. I'm gonna make a big middle point first. Just kind of use the comb to push away—push all the other hairs out of the way until we're left with whoop. Until we're left with a nice little neat section like this, whoop. It is at this point that we must wet the hair. So, we're going to take our water bottle and we are going to spritz the hair down just a little bit—oh—but it has to be open for that. Life comes at you fast. Keep your spray bottles open. Now that we have our little section, we are going to brush through it to make sure she's nice and neat—no tangles!
We're gonna take our water bottle, we're going to spritz her. Keep all the stray hairs uniform. And then we're going to take—I've wadded it up. I'm—we're gonna take one roller paper, we're gonna hot dog style fold it over the hair and slide it not quite to the ends—you see how I still have left some, some left there? And then I'm going to take one of my rollers, put it right in the middle of the roller paper, I'm gonna push it just a little bit higher. Sorry if you can't see this on camera.
But, whoop, and then I'm gonna wrap the remainder of the hair, you see we still have a little tail, I'm wrapping it around. Holding it taut, pushing the extra hairs down, and we're just going to roll towards the scalp. You're gonna have some loose hairs, that's okay, don't obsess about them. Don't think about them at night. Don't let them haunt you.
Then we're going to take two of our boutonniere pins, we are going to put one on either side to hold that roller in place and hold that hair in place—boop. I like to leave mine out just a little bit so that when the hair inevitably does this, it's trapped there—she can't go anywhere. Although if it is fighting you, I recommend getting a little bobby pin or something and just kind of whoop pinning her where she belongs. Alright! So we got one roller, she's cute. Now we need like twenty more.
So! We're going to trace around the next place that we want one. I'm basically going to kind of put this one at a weird little angle. So, if my finger is the next roller, it's not going to be like going straight back or anything it's going to be kind of going diagonally. Cause what's gonna happen is you're basically going to put one roller here and then one roller here, so it makes this cute little triangle. And then we're going to cascade them all the way back by making more and more rows—if that makes sense. It'll make more sense once I actually do it.
I'm just making another section. I'm using my rat tail to carve out my next section. Making sure that I don't have too much hair because this is probably the densest part of the wig right at the crown. I hate to deal with you again. And then I'm going to roll, wrap the little tail around. Can't quite see it—I'll try to show you what I'm working with. Here's some hair that's in the paper, here's the hair on the roll. And I'm just gonna ope! Use my hand to slowly roll her down, I'm using my fingers to track the hair cause she's gonna wanna do this! Don't let her. Ope, there you go.
This is gonna take some tries to get right, and that's okay. This is going to be a lengthy process. Put on a show, take a deep breath, pour yourself an age-appropriate beverage. It's gonna be a long haul. Bam! And then we've got a second roller, so you see how it's kind of at an exact angle. I'm gonna do some more so you can kind of see where I'm going with it.
So! Spray it with water. Comb it through. I'm doing the roll that's right next to the one we just did, kind of going around in a semi-circle. Rolling paper, hot dog style, fold her around. Roller in the middle of the rolling paper, pull it up, wrap around, take the tail, wrap that around. And tuck that tail in as you roll it down to the scalp. I've rolled so many wigs and it's still—it is still a process every time.
So, at this point we've gotten rid of all the densest hair. Do you kind of see where I'm going with this? I'll just hold it up. See, we've got our main roller and then the rest are just kind of surrounding it. All of them are rotating downwards cause that's the way the hair's gonna fall. If you do it the other way, it's not catastrophic—it's just wrong. No. It's not—it's not a big deal. It'll still roll really nicely. I always say styling is about 20% curling, like...oh gosh I'm bad at math...40% teasing. And then...what's left? 40%? So, 20, 40, and now. Yes! 40 more percent combing and styling it. So, if the curler set does not go perfect, that's not the end of the world.
So, you can kind of see your tracks now. Those are the parts that the hair is sewn to. You see those little horizontal lines? Those are gonna be our guide for how—how big our next sections are gonna be. So, let's just take two of them and see how big that is. Whoop. I just like to run my comb along between the tracks and then pull out and then it's basically a section. So ya! Looks like we've got actually like three tracks in here. One above, one in middle, one on bottom. That'll be good enough for one section so we're gonna just roll that.
You'll notice I use a couple different angles for which to roll—as in like angles that I hold the hair at. But generally, it's out away from the scalp. You don't want it to be loose and hangy like that, otherwise your hair will fall right out. Okay. So, I've noticed that this back section right here. We've got a lot more hair right up at the scalp and that's normal again. And so, I'm just taking one less section as you can kind of see I'm going up. It's fine. The rows will still match up.
Another one, she's a little wonky. They're sisters, they don't have to look the same. They just have to sort of be going the same way. Then, we're gonna continue this trend around. And this is the set halfway done so far—halfway done the back of it anyway. Now we're just gonna make a new row. The easiest way to make all your sections even is just keep following them around the tracks. We kind of botched this one—that's okay. This whole like, little section then is going to be kind of weird in comparison to the rest. And that's fine. The curl will not be affected, I promise. And if it is, it's a statement.
You may notice this wig is pretty long—if you do a shorter wig, then it's actually a lot easier to curl, then it takes less time. Once you get farther down, the hair will stop fighting you as much and then you'll be able to use just one pin to pin it up. I don't know if anybody hates the sound of Styrofoam, but I once had a friend describe the sound of Styrofoam making his teeth itch. Ya. Specific. But ya.
The curl—if a tangle is really fighting you, don't—don't be afraid to just gently and firmly destroy it. Very, you know...just take the little pick, just kind of pull it apart, like a knot, cause it is. If you've ever had to undo a little square knot, cause you knotted something way too tight. It's the same process. You just attack little parts of it and get it to loosen up gradually. If not, you just lose a clump of hair and that's just the way the wig crumbles.
Be extra mindful of the pins at the back of the head—they will come out. Sneakily. Without warning. Just make sure they're always in, otherwise you might have a saggy back of your head like I'm having right now. Won't affect the curl too bad, but if you have a much fuller wig, then it might clump hairs where you don't want them to be. As in you might just have a lot denser areas. And again, this is kind of an advanced thing. This took me a while to get right, so really be patient with yourself. Give yourself plenty of time, if it's the night before your Halloween party, this is not the time.
Sometimes your sections are gonna be wonky, like look at how big that section is. It's okay. You can still roll it that way. Just, if she's flopping and fl...you know. If she's flopping off the roller and stuff, that's when you have to be concerned but this is a thinner section cause the back of the neck—so they were basically like, we just need to make sure the hair back here is the same length as everything else. So, they didn't put a lot of density there. So, you can probably fudge it and just have a little bit of a bigger section back there and it'll be fine.
Alright! Now we're to the very nape of the neck, we have a little bit of thin hair so I'm gonna curl this. Then, we'll be in business for the front. This looks to be...such a...hm...just thinking of maybe putting it in one roller. We're gonna put it in two just—just to be thorough. It's a little wide to just put it in one cause the way you really tell is you take your roller, you put it on your hair section. If your hair section is wider than half your roller, it's too wide.
And ba-bam! We've got all the back hairs all situated. Now it's time for the front, so! Whoo! Depending on how we want this to look, I think...hmm...this girl wants a middle part really bad. Because that's the way the hair was made. So, what we're gonna do is we're gonna keep these in the same, separate sections that we have, cause it's already divided right at that middle part, and we're just gonna kind of curl it on either side.
So, we're gonna do this...is of course take the braid out, brush it out. Make sure there's no knots, and then I like to start right at the top with my comb. Kind of take a nice triangular section. Like, smaller end at the back of the hair, wider end at the front. And now, I'm gonna be curling it away from the middle part. So, we want it to cascade kind of along the way that it already is. So...ugh...if you're not contorting yourself into crazy shapes, are you really wig styling?
So! You see how it's rolling away from the middle part? Basically, I'm gonna mirror this roller all the way down so the hair is kind of just following in this flowing little cascade-y waterfall thing. Another nice little triangle section, or—she's more of a rhombus if I'm being honest. Cause we want...we wanna gather more of the hair that we missed from that first triangular section. If you've got a weird gap of hair that's just kind of hanging out and you're like, 'well where was that supposed to go?' It might have had to go with an earlier section. Fret not! Just add it into the next section.
Bam! And there's only one little section left. We've kind of got the thickest sections going the way we need to so I'm going to just, curl this one to fall straight backwards towards the curlers that we did on the back of the head, so. Alright. So, that's one side, now we're gonna do the other side. This is the part where you can very possibly catch hairs that are already in rollers. So be really careful, and just use your fingers for the most part. That's what I did right here; to kind of move around and just find the hairs that aren't already attached to a roller and pull them that way.
Cause if we go in with our comb, we might catch a lot that we don't want to take out of a roller, and then we have to do a roller over again. And then, you know, it's 9 p.m. and we've spent three hours doing this, we're crying, we've already eaten all our pizza—it's not a good time. That's a totally non-specific example.
The wig head will likely turn as you're pulling on it and stuff. That's okay. That just means, loosen your grip a little bit or pull it a little bit less. Cause we don't wanna just keep spinning her head right round. And last section. Here we go. And there you have it, here is our final set—little roller set before we steam her. Look at the ones in the nape of the neck. We have our kind of funky French ones: this one's going back, these ones are going sideways and out.
Alright! So the next step, we're gonna steam her. So you take your large, hefty bag from Gucci. You put it over your wig head. I like bags about this size just because it traps all the steam, traps all the heat, and doesn't like touch up on the wig too much. You can use other plastic bags, I just like the size of this one. It's a standard kitchen trash bag. So, our steamer is heated up. What you're gonna do, is you're gonna turn it on, stick it under there and what I do is I kind of hold the handle of the steamer from underneath cause I turned it on and then, there she goes. And remember keep the mouth of your steamer away from the sides of your bags cause it will tear holes in it like this.
And now we wait! You basically do this until the bag is hot to the touch—which takes about three to five minutes. So now we wait. Keep touching. And not warm to the touch, like you want it to like almost scald you if you touch it. Danger! The main ingredient in wigs. Okay now it's getting a little hot. Make sure you try to poke around for all the rollers at the bottom too cause those are the ones that are the hardest to get warm.
And we're gonna call that good at the bottom cause I'm getting...so, you just take your steamer, turn her off, and now you just kind of let it cool until it's cool to the touch. You just leave it in the bag. And once it's cool to the touch, we take the bag off, and let it dry overnight. Just let the steam collect, you don't want any of it to come out. Cause all the heat is doing its work in there.
Like sands through the hourglass. So are the times of our lives...this is literally gonna take like five or ten minutes.
Alright! So, now she's steamed, we waited for her to be nice and cool to the touch, we took off the bag. So, now basically, we just wait for her to dry. There are two ways we can do this. One! You can let it sit out overnight and it'll probably be dry in the morning and that'll make the curl nice and holding and whatever. If you're on a time crunch, then, we have another method!
Whatcha do is you, hang on! Whatcha do is you take a box. You cut a hole in it like right there. That's for a hair dryer. You set it upright. I made mine a little door because this is a wig oven. You take a hair dryer, you stick it in through the side, like so. And then, you put your wig right in the oven. You can see that in there. Close the door. Turn on your hair dryer for about...I wanna say twenty minutes. But. Depends on the—depends on how dense the wig is usually.
I put mine in there for like honestly forty minutes. Try not to do that unless you're really confident that your wig will not set on fire. So! Start with twenty minutes. See how that goes. If it's dry to the touch once you're done, then you're good, you can uncurl it. If it still feels a little wet, and you'll feel it right around the...you know, the...the thicker parts of the hair, then put her back in for like five more minutes and see how you feel. But! We'll find out how much this curl has lasted tomorrow when she's all dry. Cut! Sleepy time.
Hi! It's tomorrow! We've let our wig dry overnight and now we're ready to take out these curlers one by one to see how they have taken to the curl, taken to the heat. Usually, this is... ya. This sh...should be good. Fully forgot what I was saying while I was saying it. Still waking up. Alright! So.
As you can see from this first curl. Look at that. My gosh. So, she's actually curled very nicely and tightly. We're going to just brush it out. Normally this is the part where I would start teasing the wig cause I like my hair big. If you like your hair a little less big, more fitted to your head. That's fine, I'm gonna show you how to do that today.
So we're just gonna take the curl, kind of stretch it out. Take our round brush and brush it very slowly from the ends. And there you see she's kind of separated into a multiple like nice tight curls. My gosh. This wig just took to these curls. Now we're going to continue along the side of the wig. The more hair we add to this, the less it'll look like goldilocks and the more it will start looking like some nice vintage waves—which is what we're kind of going for here, this set. This curler set. Which for those of you who don't know, little fun fact, the curler set is just the shape on which you put the curlers on the head. So, we have all our to the side curlers here and we have all our backwards curlers here. So, that's our curler set.
Anyway, let's try to brush these sections together. Okay! She's giving Isaac Newton. We'll keep going. So, we're brushing from the bottom and slowly working our way to the top, you may encounter tangles. And if you encounter a tangle, what do you do? That's right! You just stop and pull out your brush and try again. A little bit lower, gently getting the curls out. You get an A in wig styling—something that is possible to achieve and normal to want.
So, kind of to do this faster, I normally take out an entire row. Hang on, whoop! I usually take out an entire row at once and just kind of brush it together, cause we're just brushing it, so here we go.
So now I'm basically gathering everything all up in my hand like this. And I'm just brushing it through. This is gonna be kind of a slow process of just taking each individual strand, brushing it out, and then brushing it into the main strand. So, let's see how that looks. Now that we've gotten the hang of it, I'm just taking them out row by row. Cause we're not doing anything too complicated, we are just taking out the rollers and then brushing them.
If the wig doesn't seem like it wants to brush out, just take a deep breath, and remind her that it's for her own good. Sometimes wig styling is just wrestling with the wig and forcing it to do what you want—and that's okay. It's a very therapeutic process, eventually. After the curling process, the wig might look a little less lustrous than it did before, just trust the process. Trust the process. The process. Trust the process. The process.
It'll all be fine in the end. We're gonna add hairspray and that'll add more luster. Alright, so far, she was Isaac Newton, now she is Gandolf held on to an electric fence. So, we're getting there. So, the downside when you have all this puffiness on the bottom is that this is the golden opportunity for hair to tangle when it's made of plastic so you're gonna have to probably ignore this until the next step which is we're going to add hairspray to make her a little less crazy. To make everybody work together. While you're brushing it out, you can really be kind of forceful with it when you're brushing. It doesn't have to be very gentle cause this curl's in there.
So, the good thing about this texture is it's actually very perfect for any kind of crazier styles you'd wanna do with curls—is when you have this kind of dryness. You could do a Bellatrix Lestrange for example. You could do some kind of gender swap Dumbledore. Dumbledora the Explora! Anybody out there trying to be creative for a Halloween party, feel free to steal that. It's all yours.
If you wanna know what I'm doing in back, I'm basically taking my hand, finding a nice groove in the wig and just brushing beneath it. So, we keep this groove where we have it and then we create more down below. And then I can karate chop there and keep going. Okay, that's more of what she's supposed to look like right here. Think you're just gonna have to—I'm gonna do what I did to there, it worked.
What is happening is I'm grabbing the lowermost hair and I'm telling it to get its stuff in a groove so that I can add it—all the upper hairs to it and make a nice little wavy thing. Instead of this puffy cloud we've got going on, which serves, but like not what I was going for originally. That may be the most frustrating thing about styling is that it is an art and you may not always get what you want. But we try our best.
Alright! She's completely out of the curlers. This is kind of what she looks like right now. From here, we do the styling. Generally. If you like how she is. Then, that's great. Keep her as is, swish her around. She's got a lot of great movement and body just from that curl. If it were me though, I would want to get rid of some of the strandiness we see on top and on the bottom. Considering how much this has fought me so far, I think we're just gonna have to agree to disagree, this wig and I. So, we're going to keep it puffy on the bottom, we're going to try to smooth out the top.
For this, you're gonna wanna little hairspray. I use TRESemmé hold number 4. You can use most hairsprays. What you want is just something kind of wet to marry the hairs back together because we have all these little, tiny strands; they need something to help them stick together so we have a solid...that's it. A solid hairstyle.
I'm going in with my rat tail for this because it's way better for organizing the hairs—and once again, if you hit a snag... you let go. Just a little bit of hairspray. Took me forever to learn this but apparently the optimal length... the optimal distance for hair...spraying hair is like...twelve ish inches away, maybe eight to twelve inches away. Cause if you're like up in here you're just gonna get like droplets of hairspray all up on it, and then it'll be kind of nasty to comb out. And clumpy.
Oh my gosh, okay. I'm just taking the comb and I'm just kind of brushing the hairspray in. Do you see the difference already? My gosh. Alright. We're gonna keep going. Alright. It just came to me. This is Geralt of Rivia got a perm. Can't battle monsters without all this volume. My gosh. This color is very perfectly Geralt of Rivia and honestly the curl kind of made it look a little strandy which is fine because he's dirty. Like all the time. So, it made it look realistic, but we're just gonna make it look nice and neat because I need it for my sanity.
Sometimes you're gonna encounter a curl, uh... little tangles that don't wanna go anywhere and you're gonna take the end of your rat tail comb, because that's what this is for, and just kind of hold the wig head, and just, just kind of tug at it from various angles until it comes right out like that and then merge everything back together.
She's kind of where she wants to be. She's a little flatter than we had her before on the bottoms which is kind of where I wanted it to go. What I think we need to focus on is how to keep this hair out of the face that needs to be probably clipped or bobby-pinned right here. And then I think we've got a nice curler set, but yes. Oooh! Look at how swishy.
If you're not a big fan of how curl—how kind of wild it is still, you can keep going in with a comb and hairspray and work your way all the way down through these rows. It's difficult but it does pay off. Cause that's generally how I make all of my wigs, just slowly but surely, have patience with yourself above all. And this is how she turned out.
Again, if it were me, I think I would make it a little bit crisper by continuing to comb all the way down and we'd get these really nice defined waves. She's just a little dry and a little bouncy and I didn't want to fight that. She's just—look at how cute she is. She's swishy and swervy. That's how to curl a wig. If you have any questions about this process at all, leave a comment. I might answer. Until next time, this has been Miss Ava Cado with FUN.com. See you next time. Bye!
Other Helpful Wig Styling Tutorials
We're not done just yet! Here are a few other wig tutorial videos that you may find helpful in your wig-styling journey. Certain character wigs may have you scrambling to learn how to dye a wig for strange colors or multi-colored effects—and let's not forget cool, spiked anime hair! Let's get out there, make mistakes and get messy.
1. How to Wear a Wig Cap with Long Hair
It's important to wear a wig cap before throwing on your wig so that you don't have any of your hair peeking out from underneath the wig. While this isn't usually difficult to do, the length of your hair can make it harder for you! Before you decide to cut your hair just for the sake of wearing a wig for cosplay or Halloween, here is a wig cap tutorial for long hair.
2. How to Add Spikes in a Wig
If you like to cosplay anime characters or characters from video games, there's a good chance that you may be looking to wear a wig with spiky hair. Sure, you can get them pre-styled, but they don't always hold up through storage and shipping, so you may find it better to do the styling yourself. You may only need a short wig if the character's hair isn't terribly long, but there's also the option to use longer wigs as well. We're sure that you can do it after watching this video!
3. How to Dye a Synthetic Wig
Have you ever needed a really specific wig color for a character, or have you wanted a certain kind of gradient or ombre hair? If your needs are so specific that you find your wig hard to locate, you could try dying it yourself! However, coloring a wig is different than dying your own hair, as the synthetic fibers won't take to boxed hair dye. Rather, you can use alcohol inks or even sharpies to achieve the wig color of your dreams! Just make sure you start with a blond wig or another light color wig base.
4. Basic Wig Styling Tips
When you have a vision about how you want your wig to look, you may feel the need to add some styling, or increase the volume of your purchased wig. Sure you can get pretty close, but you're a perfectionist, and "good" just might not be good enough for you! This wig tutorial video by Liechee covers some of the basics, from cutting and styling to spiking, curling and even ponytails.
5. More Wig Styling Tips
Get ready to go beyond the basics with some more advanced cosplay tips and tricks for wigs! This video will show you how to sew in additional wefts of hair for more volume (or add colors if desired), how to straighten a wig and more. You may need a long wig to do some of these additional techniques, but we're sure that you can pull it off with a little practice!
How did your first wig experience pan out? Did you decide to be a bleach blonde for a special occasion? Or did you go the trendsetter route and transform into a modern-day mermaid with long pastel strands? Have fun getting wiggy with it and let us know how it felt to rock a brand new 'do! Be sure to check out our complete selection of wigs!