

How to Do Special Effects Makeup
When it comes to any kind of scary costume, special effects makeup is critical. Plus, it's easy to create movie style magic at home as long as you have the proper utensils. You'll be surprised to see that a simple wound or gash will transform your already scary look. You can make yourself look dead, burnt, or severely injured, and you'll leave people wondering, "Whoa, is that person okay?" Make people do a double-take by working with basic prosthetics and liquid latex. Although the final result looks complicated, we promise that these gruesome looks are very simple to recreate at home! Get ready to take your creepy costumes to the next level!
Special Effects Makeup Cuts and Bruises
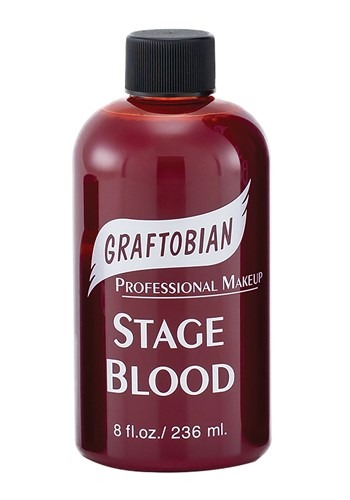
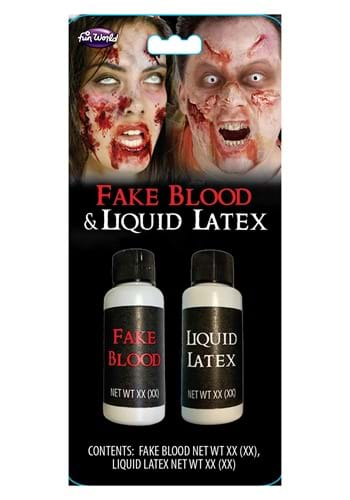
Adding a gash to your neck is a great and easy way to look as scary as possible. This makeup application is fairly straightforward, just make sure you have all the supplies listed. You'll need extra flesh and Fixative A to keep the fake skin sealed. A bruise color-ring and 8-color palette are necessary for the discoloration around the wound. Next, you'll need lots of blood of course! Make sure to pick up coagulated blood, stage blood, and squirt blood. Finally, you need some sponges and brushes to complete the application. Have your triangle sponge and medium makeup brush handy. A pen cap or similar object should be nearby because you need to create a cut in the fake flesh.

Step 1: You'll need to decide the placement of the gash. When you've picked the perfect spot, put your extra flesh on the entire spot you've mapped out. Make sure it's as long as you want it to be.

Step 2: Now it's time to slice your extra flesh! Take your pen cap or a similar sharp object and make a cut in the extra flesh. This will be used as a marker to indicate where the blood will go.

Step 3: It's time to seal the extra flesh. Get out your Fixative A and put it on the piece of extra flesh, now wait for it to harden.

Step 4: Take out your triangle sponge and 8-color palette because you'll need to blend the gash to match your skin tone. Begin to stipple the colors from the palette over the extra flesh. We recommend using the green, yellow, and red from the bruise color-ring to make the wound look realistic and gross!

Step 5: Here comes the blood! Use the medium brush to paint on the coagulated blood. You'll want to paint inside the indent you've made with your pen cap or another sharp object. Use the stage blood on top of the coagulated blood and place it around the fake skin too.

Finished Look: Last but not least, it's time for the "squirt blood." Let this blood drip down your neck as a cool makeup effect. Put as much as you want!
Fake Wounds and Gashes Makeup Tutorial
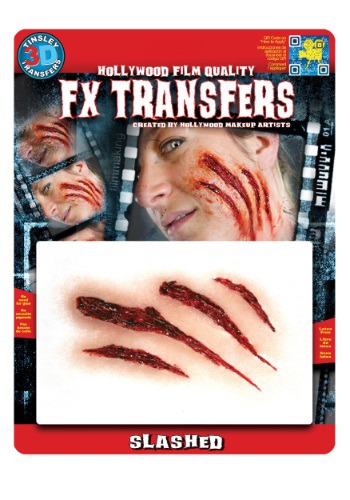
There are even more cool wounds and types of gashes that you can create. These makeup looks are bound to gross out all of your friends. Again, this makeup application doesn't take a lot of effort; just make sure that you have all the necessary supplies. To recreate both the bullet hole and claw mark wounds, you'll need the appropriate prosthetics which you can buy on our site. Again, the liquid latex and bruise color-ring are vital to creating the wounds. Dig in your makeup bag for a skin tone foundation. Stage blood, tissue, and a triangle sponge will also be needed!


Steps 1 and 2: It's time to indicate where you want your prosthetics to go. Place dots on your skin with an eyeliner pencil so makeup placement will be easy. Keep your package handy because you'll need those instructions too. Find the adhesive that comes in the package and use that to glue the prosthetic pieces to your skin.


Steps 3 and 4: Next, you'll need to use the liquid latex. Around the edges of the prosthetic pieces, apply the liquid latex and be sure to smooth out the creases. Use the tissue to blend in the edges of the wound on your real skin. Remove any excess tissue that isn't glued onto the liquid latex. Be sure to let it dry out. Take your foundation and apply is around the edges of the prosthetic piece. Make sure to cover all of the liquid latex.


Steps 5 and 6: Now you will need to get your bruise color palette. Use the green, yellow, brown, and red face makeup to make your wound look nasty and bruised. Last but not least, add as much stage blood as you want!

Finished Look: As you can see your finished look will transform your appendage into a bloody, disgusting mess! Assemble amounts of fake blood and you'll have everyone thinking you've been bitten, beaten, or shot, or maybe all three at the same time.
Zombie Bite Special Effect Prosthetic Makeup

Have you ever wondered what would happen if a zombie actually bit you? Of course, you would turn into a victim of the undead, but what would the bite look like? We're going to teach you how to create a vicious looking zombie bite from the comfort of your own home. All you'll need is to pick up a few things. Make sure you have some rigid collodion, extra flesh, and a bruise color-ring. For the bruising and the oozing blood, pick up some squirt blood, stage blood, and a color palette. Go to your makeup bag for a stipple sponge, a triangle sponge, gray eye shadow, and small and medium makeup brushes. Now you're ready to create a zombie bite!


Steps 1 through 4: Decide where you want your zombie bite mark to be. Take the rigid collodion and use it to mark the teeth placement. Dab the stipple sponge in the yellow and green colors in the palette and place it around the bite. Put the green closer to the wound and the yellow farther away to make the bruising look real. Next, grab the extra flesh in small pieces and manipulate two lines where the bottom and the top of the bite mark would be. Indent with a pen cap along these lines and then use the black from the color palette to paint inside each indentation. Now it's time to blend with the triangle sponge. Stipple and blend the wound with the red face paint. Add some yellow and green if you want!

Step 5: Here come the veins! The veins make the wound look really creepy. Use the small makeup brush and gray eye shadow to paint on the veins. Try to make them look like they are popping out of the wound.

Finished Look: Finally, add as much blood as you want! What kind of zombie will you be once the wound is intact? Will you still have an intense hankering for pizza, or will you only want to feast upon brains and intestines. Let us know what zombie life is like!
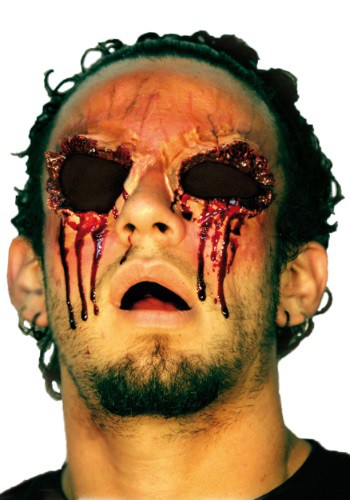
Burnt Skin Special Effects Makeup

Is there anything scarier than burned flesh? We don't think so! Now you can make your skin look like it has been scorched by flames. You just need a few supplies to make this happen. Grab liquid latex, some tissues, a medium makeup brush, and a triangle and stipple sponge. The bruise color-ring is a must, as well as some clear lip gloss and your trusty tweezers. Now, we're ready to make magic happen!


Steps 1 through 6: Put a thin application of liquid latex where you want the burn to be and place one tissue on top of that. Rip off access tissue and let it dry completely, then use your foundation and triangle sponge to cover the area once it's fully dry. Rip small holes in the latex with a seam ripper and then apply yellow makeup inside the holes. Dab your stippling sponge in the brown color and drag it across the entire piece of latex for a dirty look. Paint the holes with red paint from the color-ring. Finally, take your clear gloss and glide it over the wound to make the burn look shiny and fresh.

Finished Look: Ta-dah! You are all done with your scorched skin look and now you're ready to show it off. People will be both amazed and horrified at how realistic your makeup application looks and they won't believe that you did it all by yourself. You'll look like you're ready to star in your own horror movie once you have all the gruesome prosthetic pieces in place. Remember, you can make any part of your body look burnt just by following these steps. Be sure to let us know about all the people you scared with this special effects look.
Special Effects Torn Face Makeup Tutorial
Want to bring a two-face look to your Alien costume? This tutorial is sure to shake things up! You can watch a step by step guide to making yourself look like Alien is taking over your body. Not something most people want to experience in real-life but the special effect is pretty darn rad! Dive into our special effects catalog and you’ll find all sorts of materials to up your costume’s ante. From liquid latex to tattoos to eerie prosthetics that’ll help you create scarring or monstrous effects, there’s no reason why you can’t customize your scary costume to your twisted heart’s content.